Running the Apache Beam samples on Google Cloud Dataflow
Prerequisites
We’ll start by preparing a Google Cloud project, enabling the required apis, a service account and a Google Cloud Storage bucket.
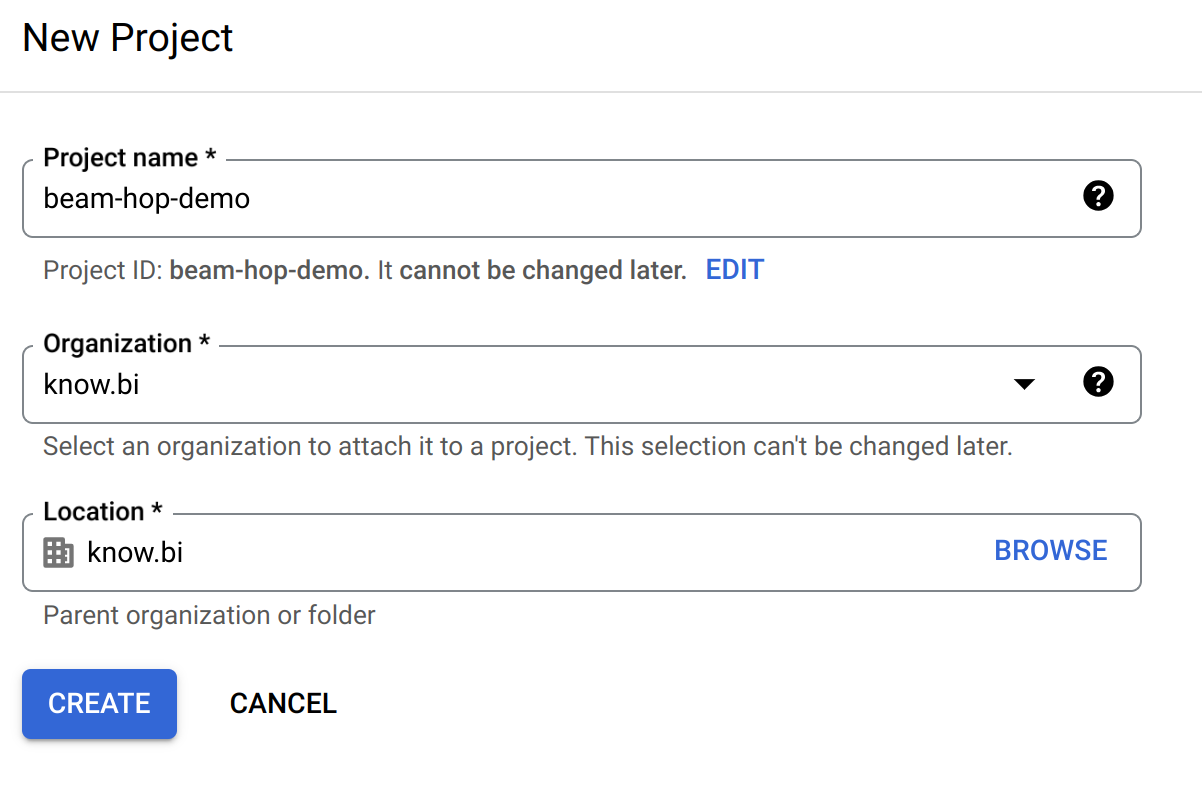
Head over to the Google Cloud Console and create a project.
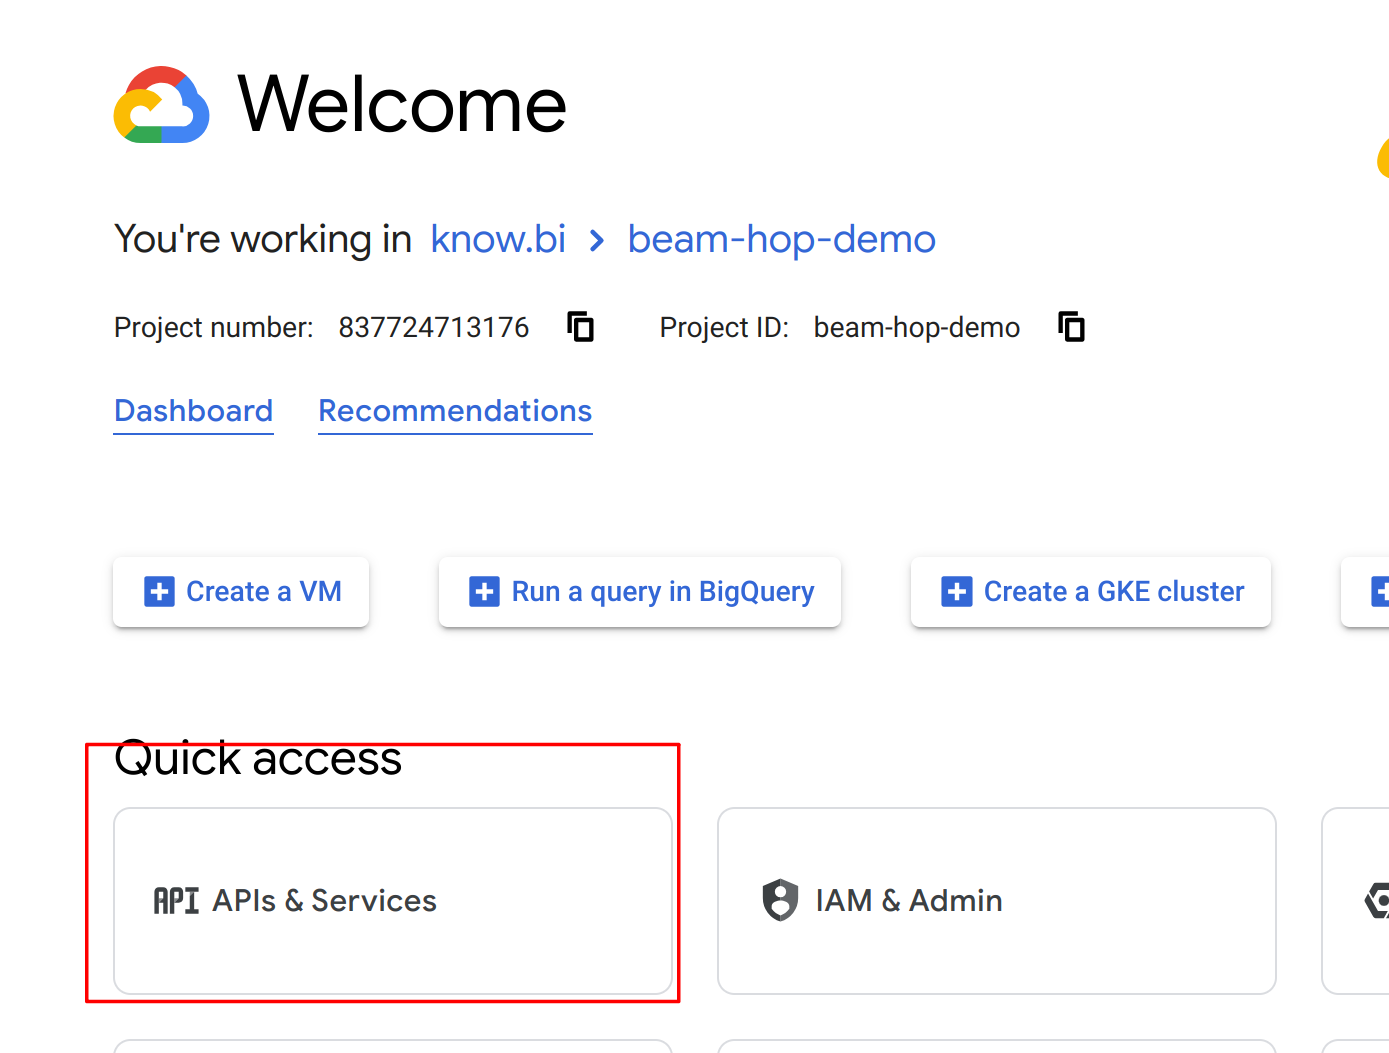
Next, make sure your project is selected and, go to "APIs & Services" and enable Google Cloud Storage API and Google Dataflow API.
In the "Credentials" tab of the Google Dataflow API home screen, you’ll see the service account that was created after you enabled the API. You’ll need this service account later on.
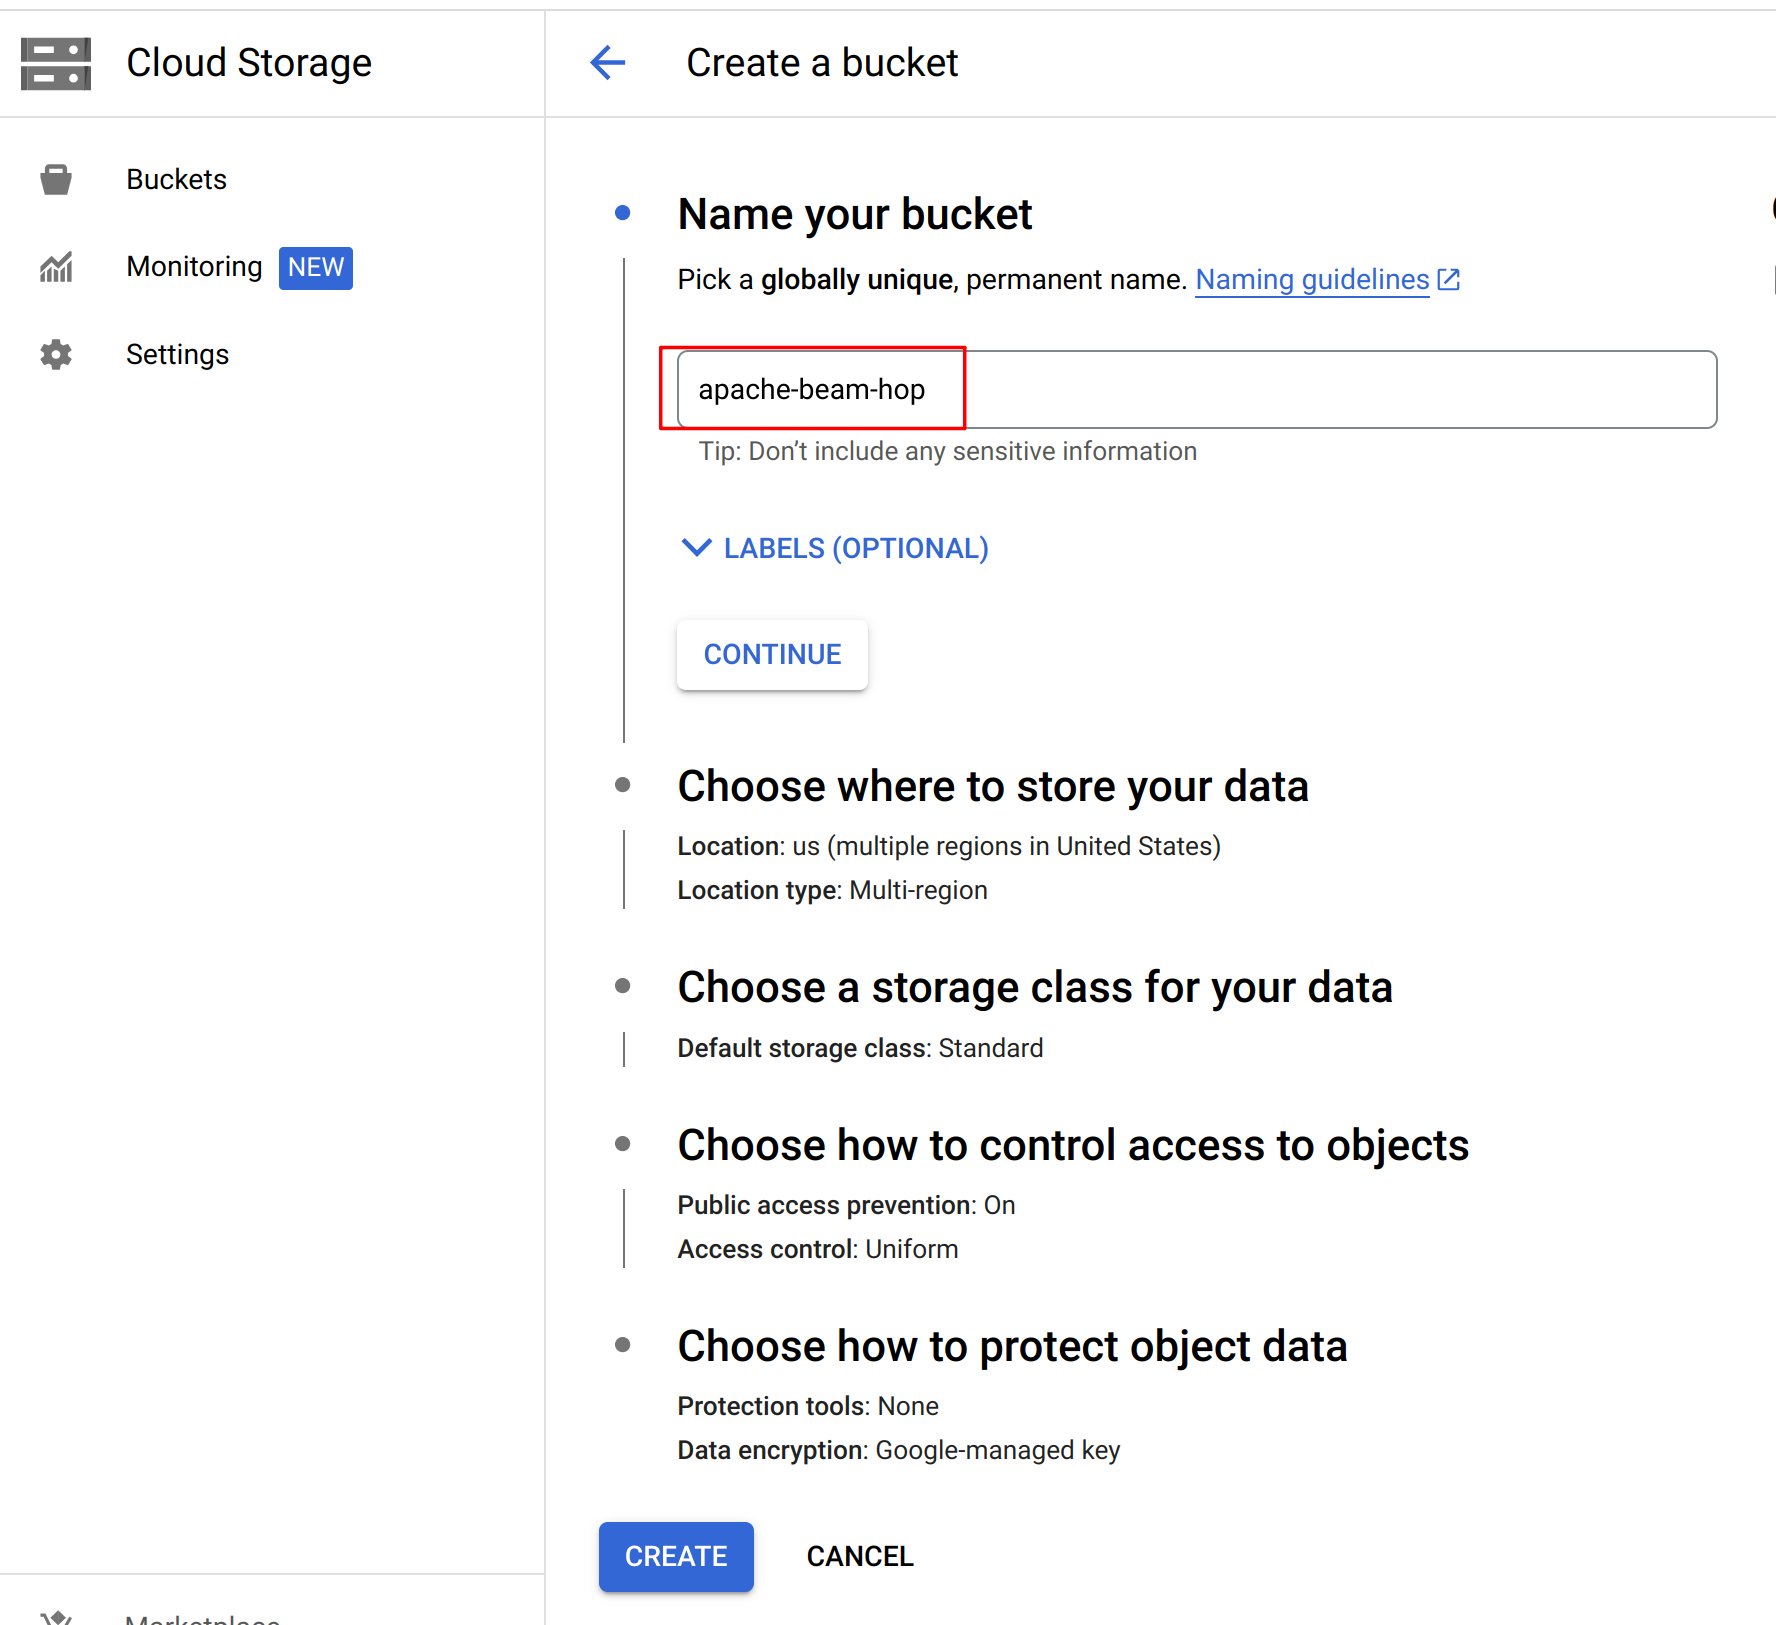
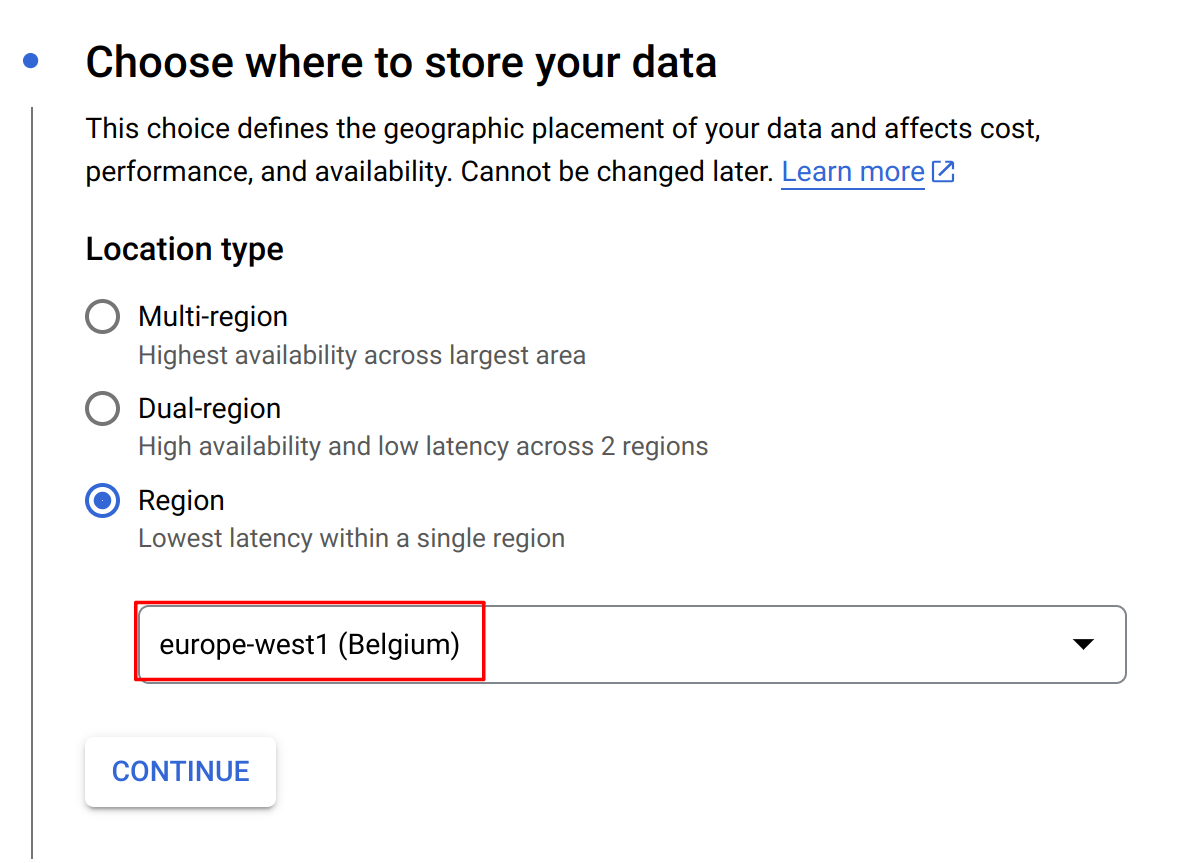
Next, we’ll need to create a Google Cloud Storage bucket. Go to the Google Cloud Storage page for your project and create a bucket. we created a bucket "apache-beam-hop" in the "europe-west1 (Belgium)" region. All other settings can be left to the defaults.
Create two folders "input" and "output" in this bucket and upload the two .txt files from the "beam/input" folder in your Apache Hop samples project to the input folder.

In the Google Cloud Storage screen, select your bucket, then "Permissions", make sure to switch to "Fine grained access control" and make sure the service account has access to your bucket.
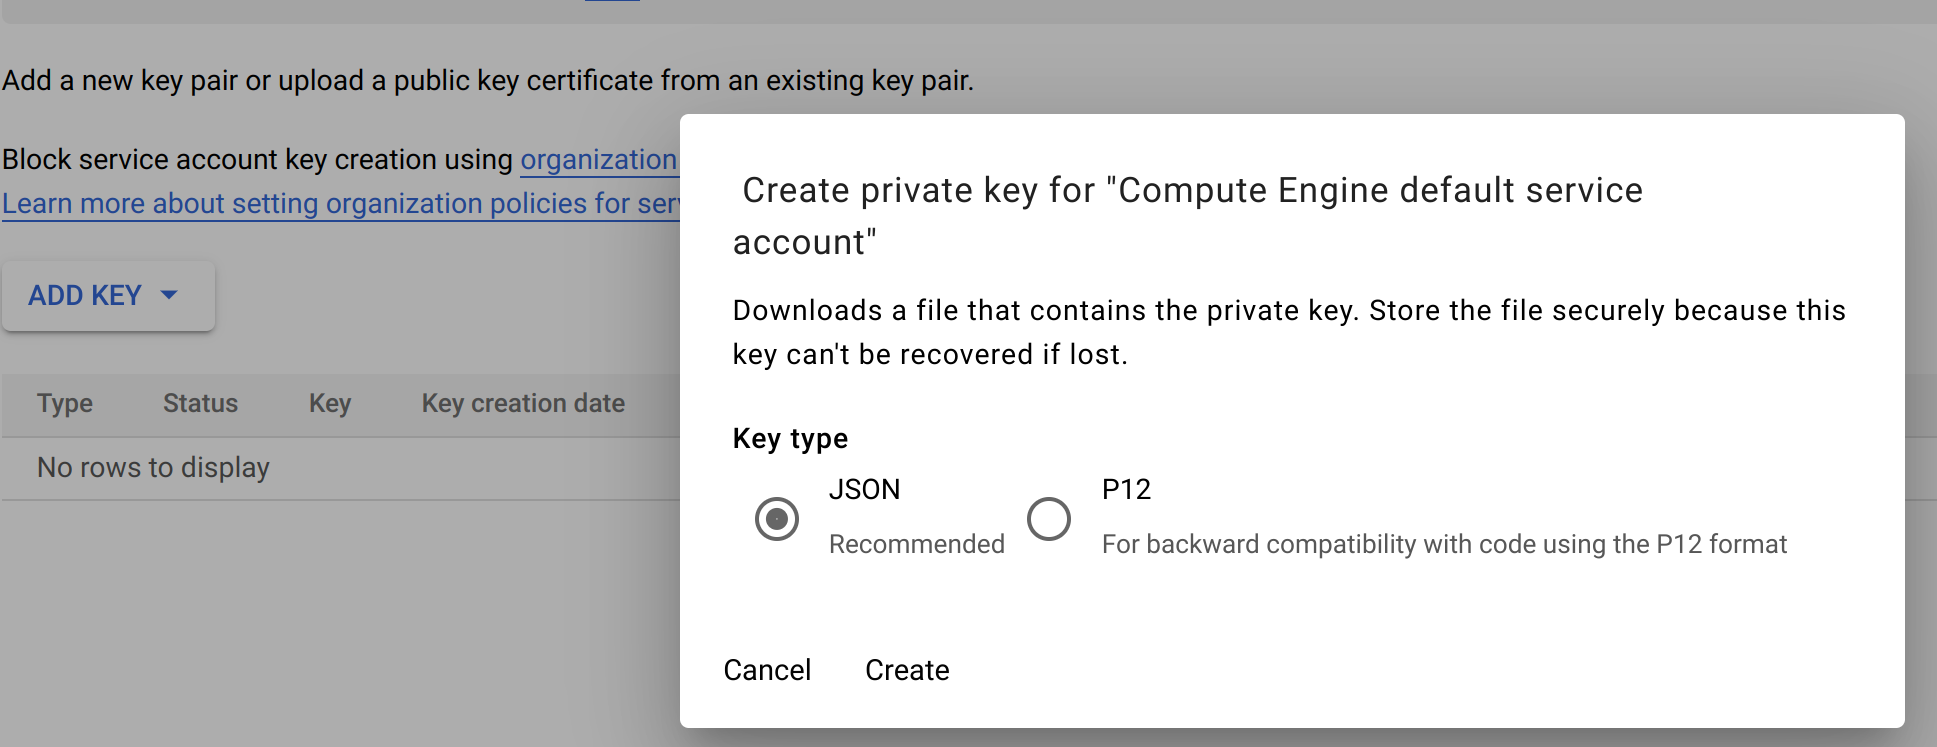
Finally, go to the IAM & Admin → Service Accounts page of your Google Cloud project and click on the service account that was created when you enabled the Dataflow API. In this page, go to the Keys tab, and create and download a JSON key.
Next, we’ll need to make sure your system knows how to use this key. There are multiple options, the easiest way is to set an environment variable. I used the command below on my Linux system:
export GOOGLE_APPLICATION_CREDENTIALS=<PATH_TO_MY_KEY_FILE>/beam-hop-demo-<project-hash>.jsonRun the Apache Beam pipelines in the Apache Hop samples project
Apache Hop comes with a number of Apache Beam pipelines in the samples project. Let’s run those in our newly created Google Cloud project.
First of all, we’ll need to create a fat jar. This fat jar is a self-contained library that contains everything Apache Beam and Google Dataflow will need to run our pipelines. This jar file will be several hundreds of MB and will be uploaded to the Google Cloud Storage bucket we created earlier.
Click the Hop icon in Hop Gui’s upper left corner and select "Generate a Hop fat jar". After you specified a directory and file name (we used /tmp/hop-fat.jar) to store the fat jar, Hop will need a couple of minutes to generate your fat jar.
With the fat jar in place, open the samples project in Apache Hop Gui and switch to the metadata perspective. The samples project comes with a pre-configured DataFlow pipeline run configuration that we’ll change to use our newly created Google Cloud project.
Edit the run configuration to use the settings for the project we just created:
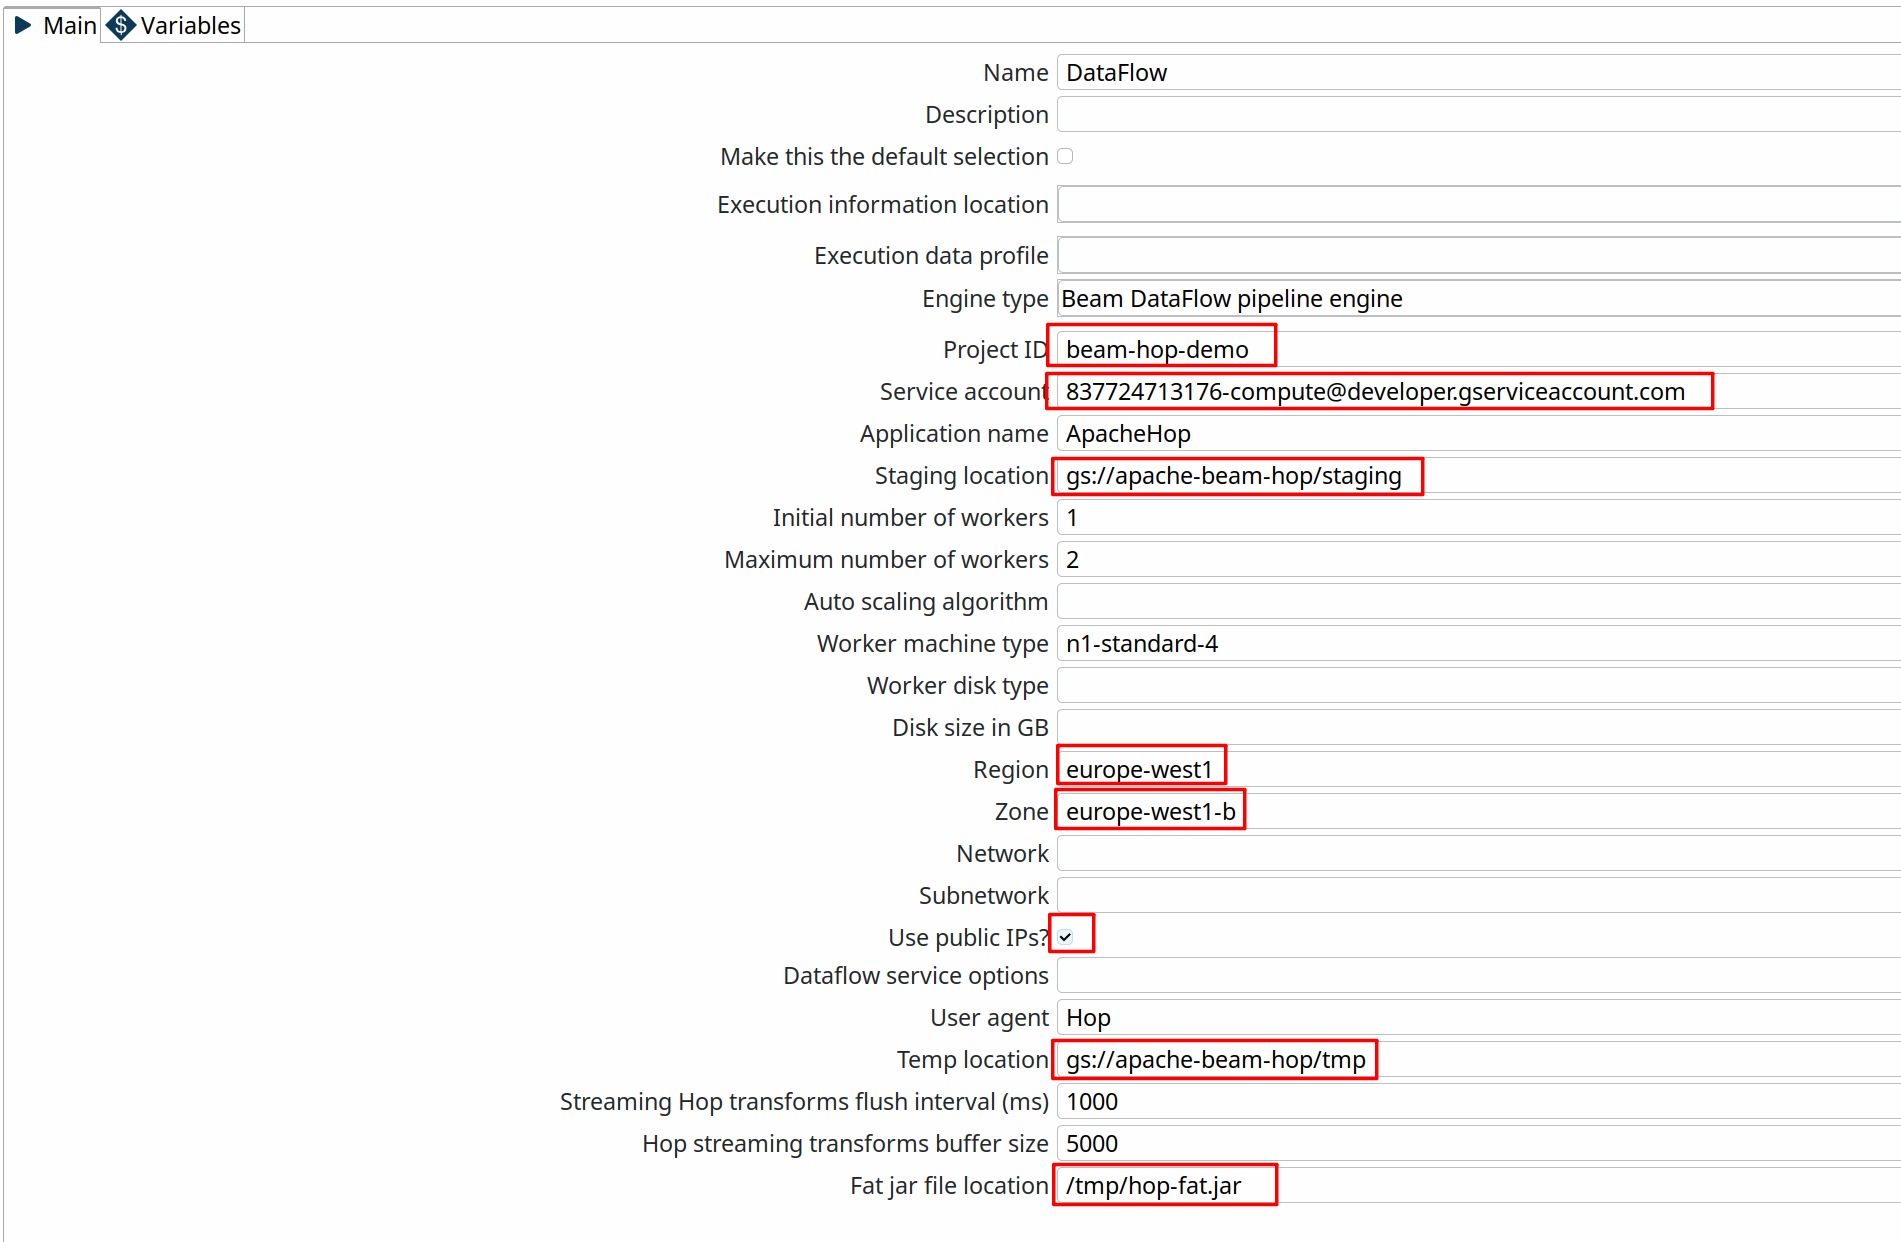
For the sake of simplicity, check the "Use public IPs?" option. Check the Google Cloud docs to learn more about configuring your project to run with private IP addresses.
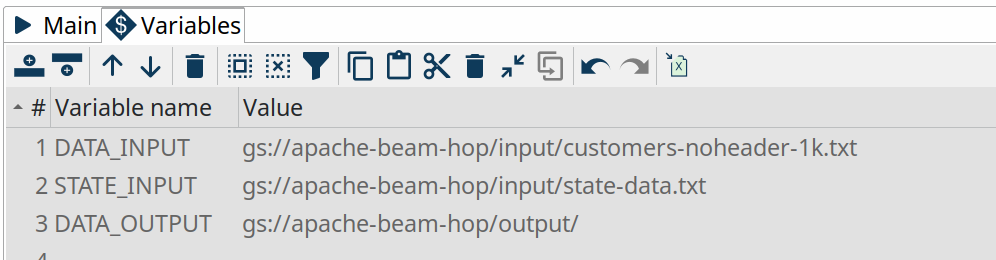
In the Dataflow pipeline run configuration’s variables tab, change the values DATA_INPUT, STATE_INPUT and DATA_OUTPUT variables to the bucket name you just created. Als change the filename customers-noheader-1M.txt to customers-noheader-1k.txt.
INFO: As mentioned in the introduction, distributed engines like Google Dataflow only make sense when you need to process large amounts of data. Working with small files like the customers file we’re about to process doesn’t make any sense in a real-world scenario. Working with small amounts of data will always be a lot faster in the native local or remote pipeline run configuration.
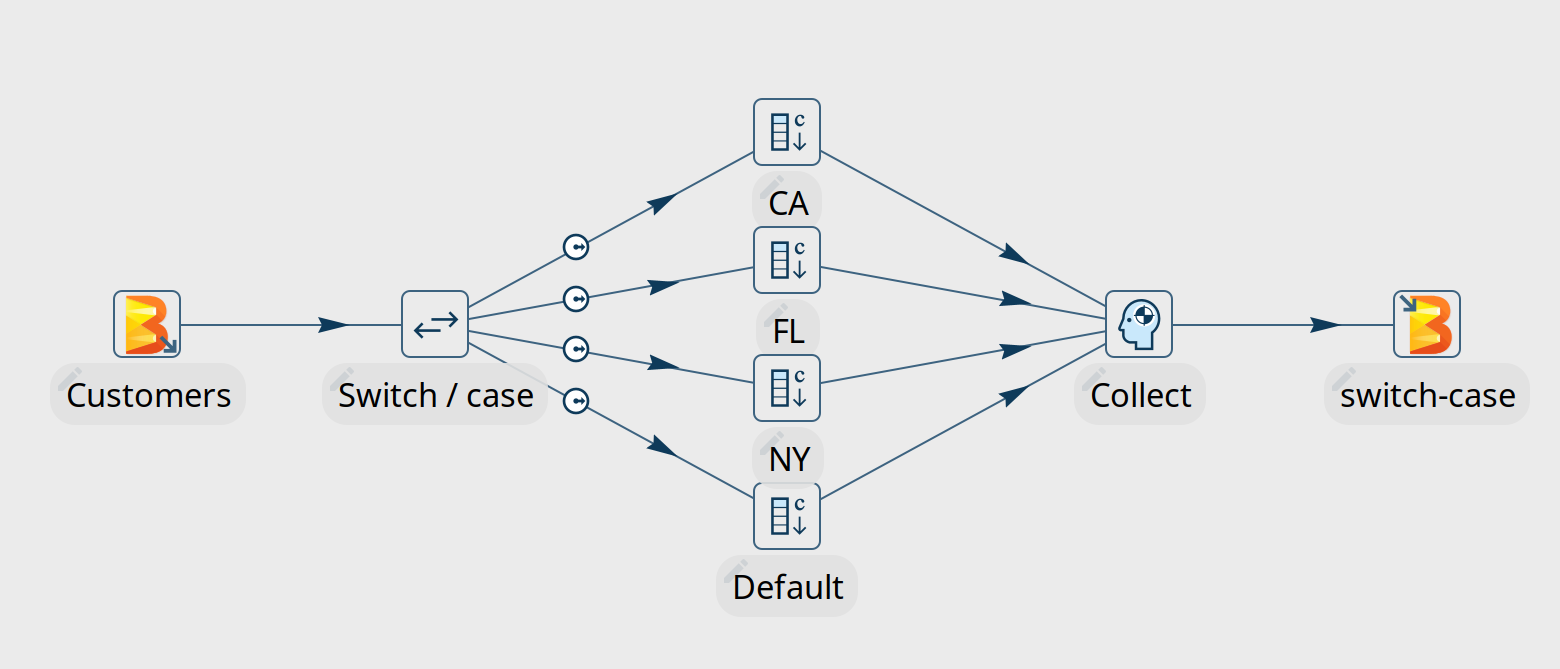
You now have everything in place to run your first pipeline in Google Dataflow. Go back to the data orchestration perspective and open beam/pipelines/switch-case.hpl from the samples project.
The Beam File Input and Beam File output transforms at the start of the pipeline are special Beam transforms. Both point to Beam File Definitions that you can find in the metadata perspective. The only thing these transforms do is specify a file layout and a path (the $${DATA_DIR$} variable you changed earlier) where Dataflow can find the input files to read from and output files to write to. The rest of this pipeline is Just Another Pipeline.
Hit the run button, choose the Dataflow run configuration and click "Launch".
Apache Hop will upload your fat jar to the staging folder in your Google Cloud Storage bucket, which will take a couple of minutes (check the "staging" folder in your bucket). When that is done, a dataflow job will be created and started. Creating the job, starting the pods and running the pipeline will take another couple of minutes.
The Dataflow job should finish successfully after a couple of minutes. Remember: distributed engines are not designed to handle small data files, the native (local or remote) pipeline run configurations will always perform better on small volumes of data.
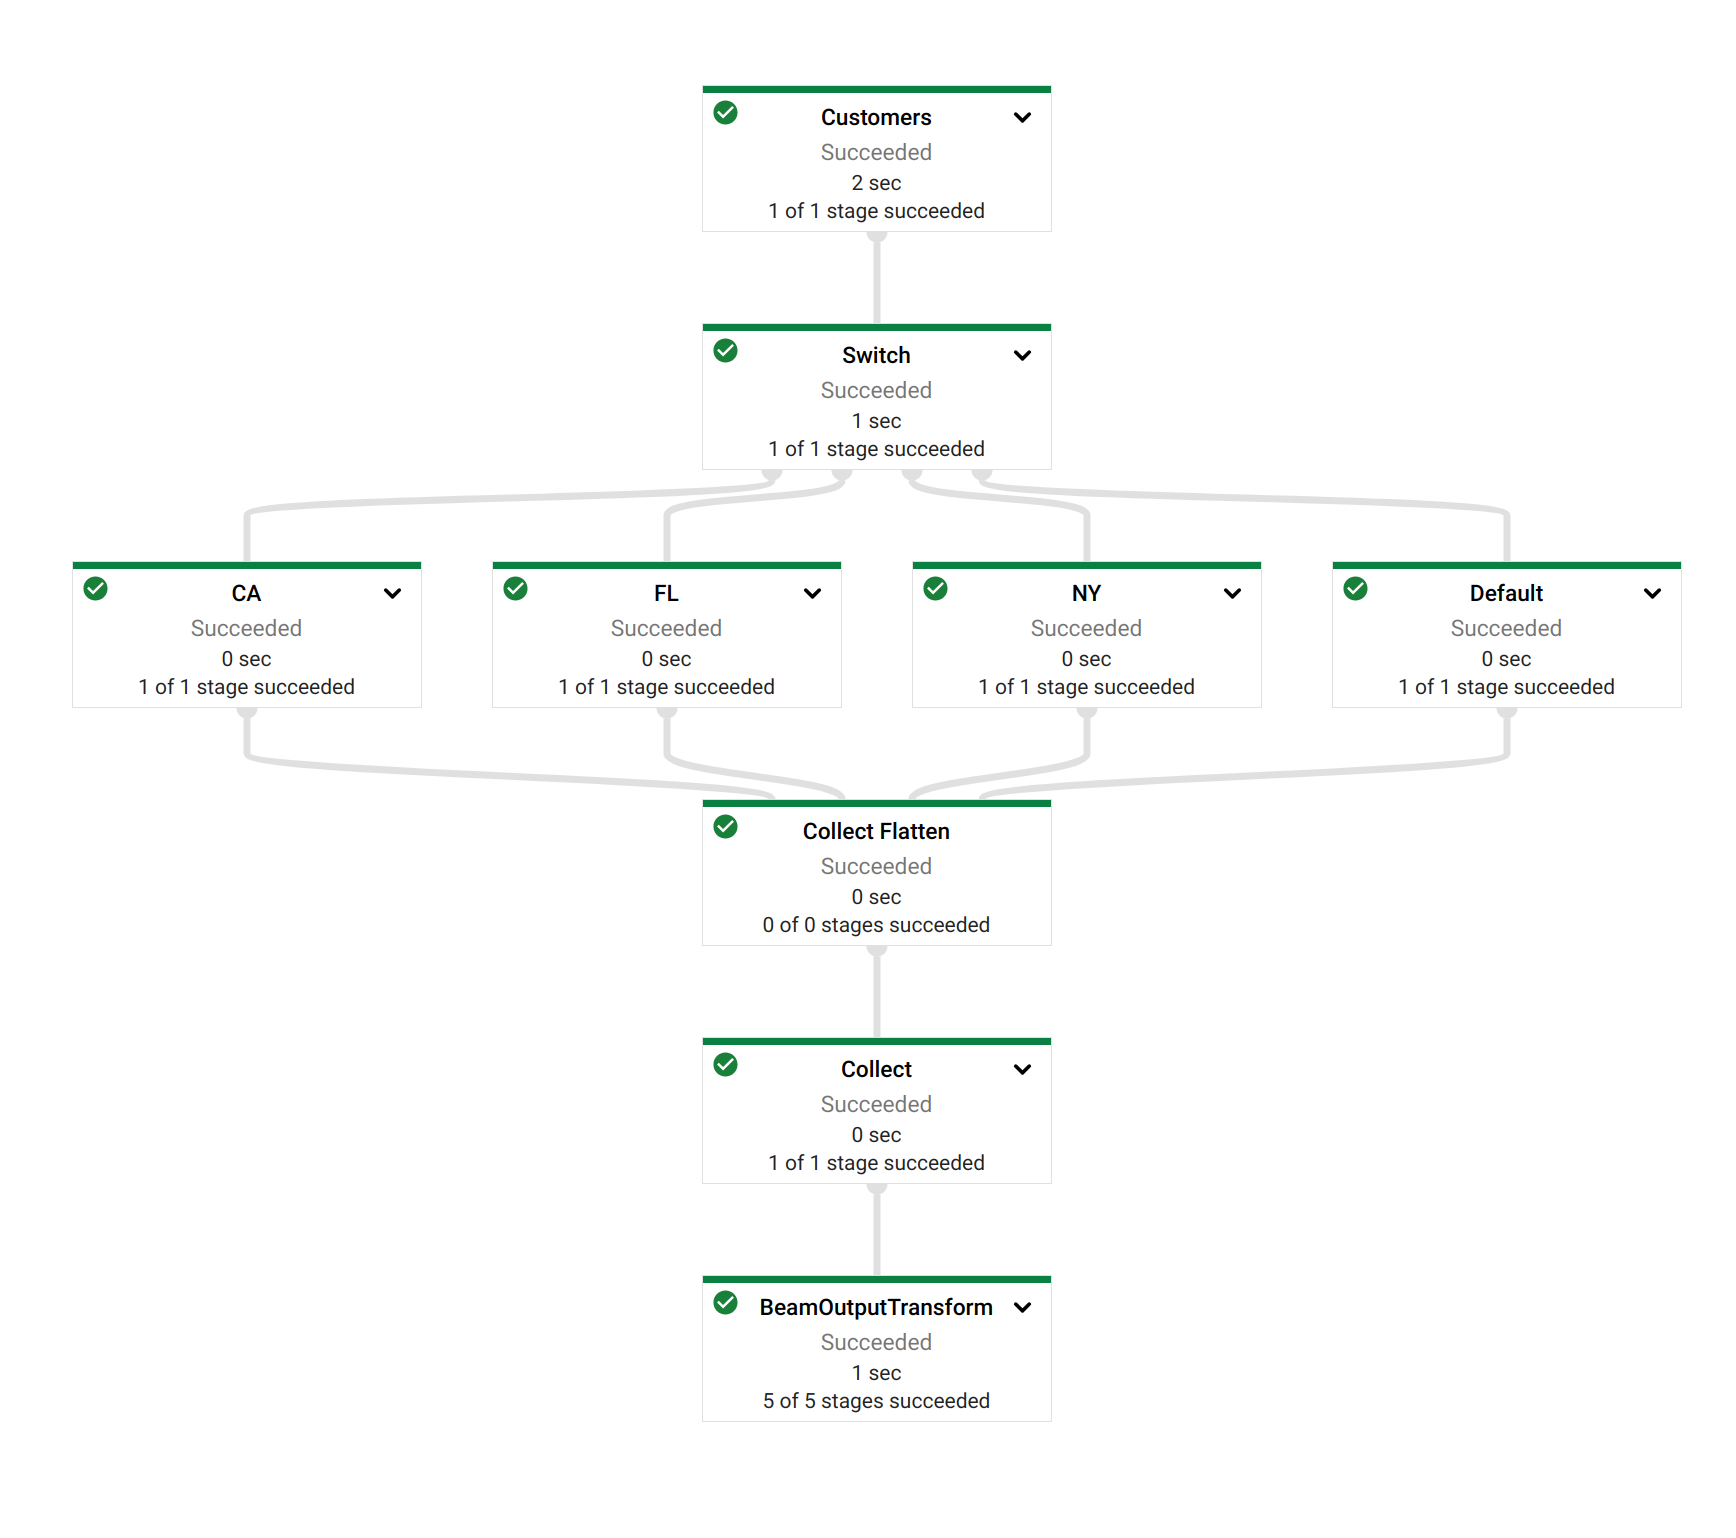
Notice how Dataflow created a job where the visual layout and the transform names are immediately recognizable from your Apache Hop pipeline.
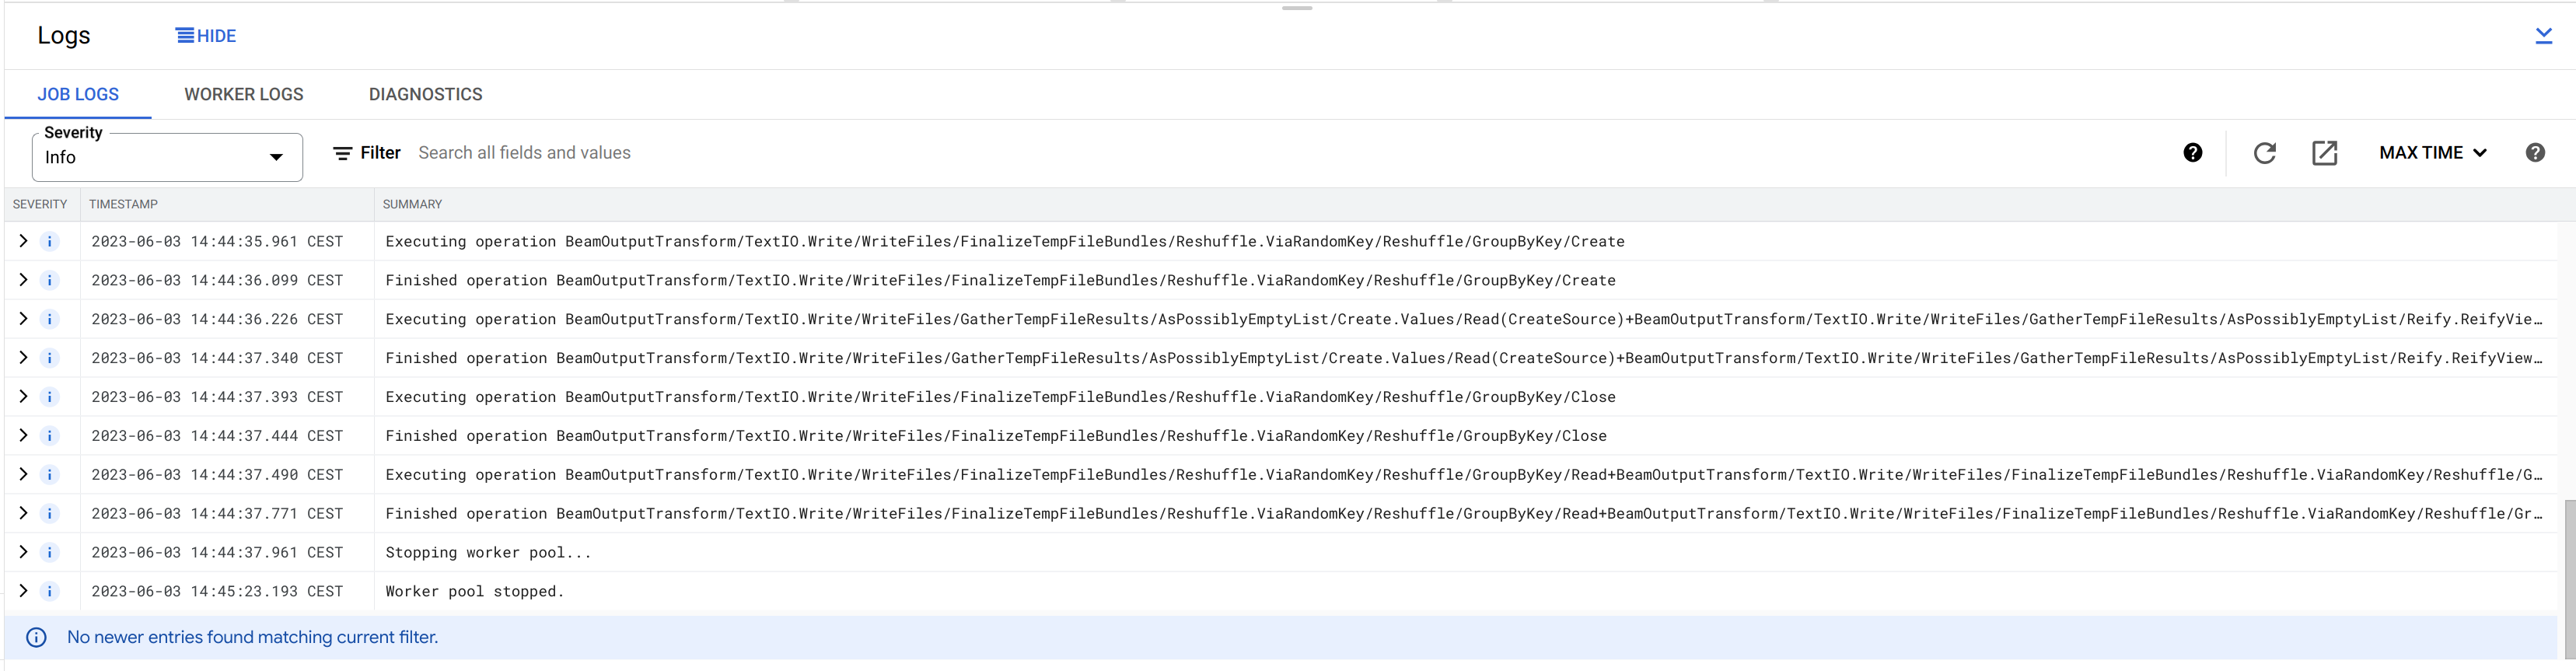
Check the logs at the bottom of the page.
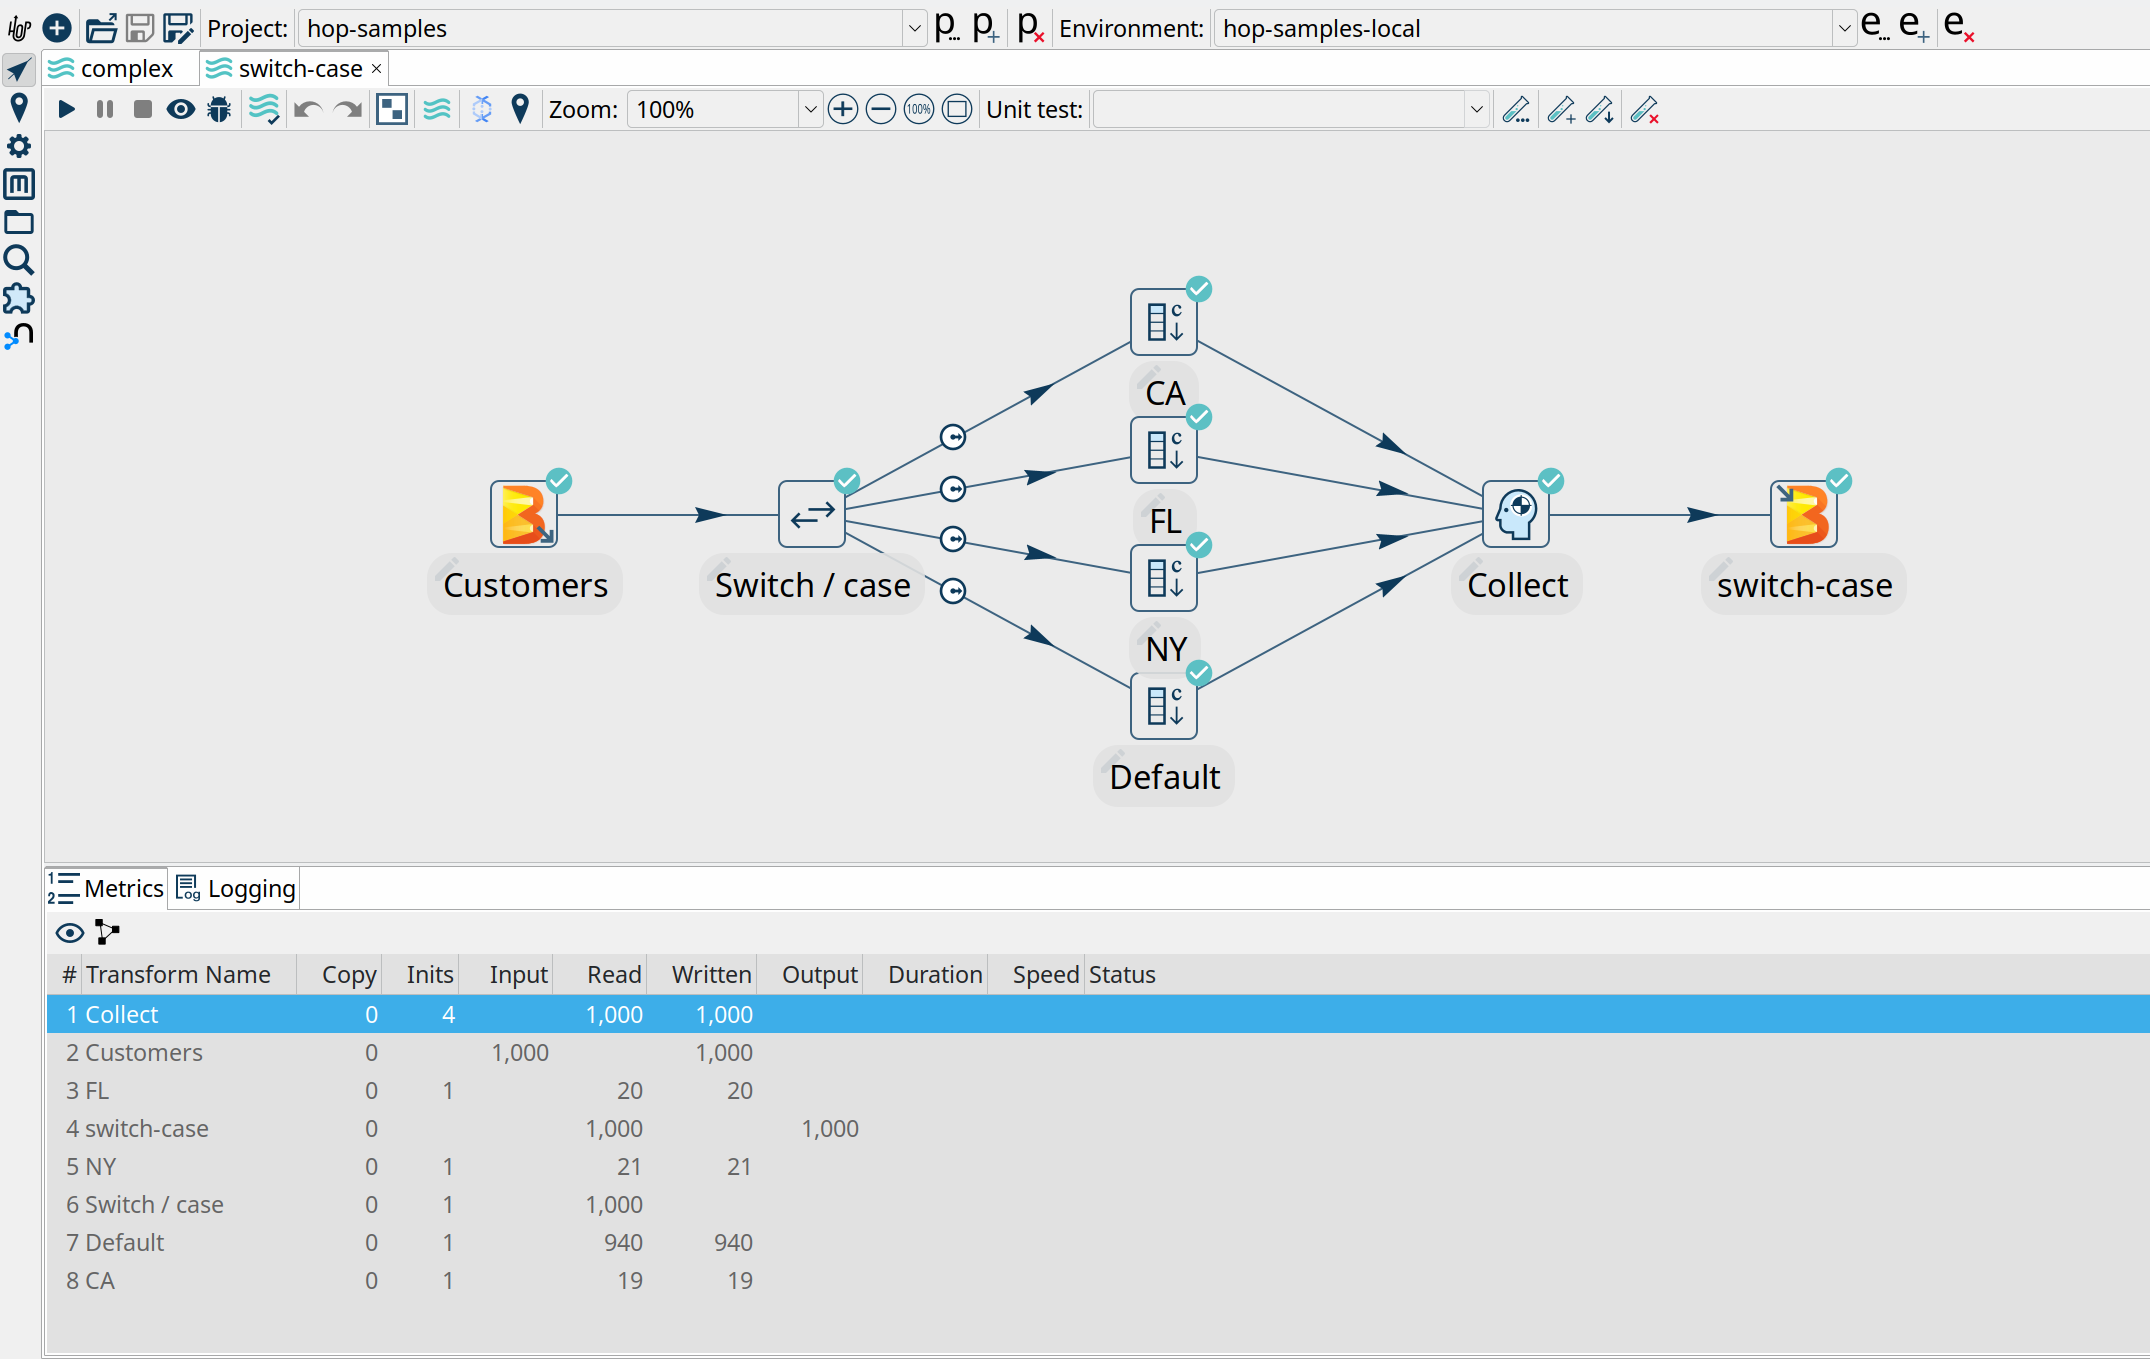
Now, switch back to Hop Gui and notice how your Switch Case pipeline has been updated with green success checks and transform metrics. The logging tab looks a little different than what you’re used to from pipelines that run in the native engine. Apache Hop depends on the logging information and metrics it receives from Apache Beam, which in its turn needs to receive logging and metrics from the called distributed platform (Dataflow in this case).
2023/06/03 15:44:18 - Hop - Pipeline opened.
2023/06/03 15:44:18 - Hop - Launching pipeline [switch-case]...
2023/06/03 15:44:18 - Hop - Started the pipeline execution.
2023/06/03 15:44:19 - General - Created Apache Beam pipeline with name 'switch-case'
2023/06/03 15:44:19 - General - Handled transform (INPUT) : Customers
2023/06/03 15:44:19 - General - Handled generic transform (TRANSFORM) : Switch / case, gets data from 1 previous transform(s), targets=4, infos=0
2023/06/03 15:44:19 - General - Transform NY reading from previous transform targeting this one using : Switch / case - TARGET - NY
2023/06/03 15:44:19 - General - Handled generic transform (TRANSFORM) : NY, gets data from 1 previous transform(s), targets=0, infos=0
2023/06/03 15:44:19 - General - Transform CA reading from previous transform targeting this one using : Switch / case - TARGET - CA
2023/06/03 15:44:19 - General - Handled generic transform (TRANSFORM) : CA, gets data from 1 previous transform(s), targets=0, infos=0
2023/06/03 15:44:19 - General - Transform Default reading from previous transform targeting this one using : Switch / case - TARGET - Default
2023/06/03 15:44:19 - General - Handled generic transform (TRANSFORM) : Default, gets data from 1 previous transform(s), targets=0, infos=0
2023/06/03 15:44:19 - General - Transform FL reading from previous transform targeting this one using : Switch / case - TARGET - FL
2023/06/03 15:44:19 - General - Handled generic transform (TRANSFORM) : FL, gets data from 1 previous transform(s), targets=0, infos=0
2023/06/03 15:44:19 - General - Handled generic transform (TRANSFORM) : Collect, gets data from 4 previous transform(s), targets=0, infos=0
2023/06/03 15:44:19 - General - Handled transform (OUTPUT) : switch-case, gets data from Collect
2023/06/03 15:44:19 - switch-case - Executing this pipeline using the Beam Pipeline Engine with run configuration 'DataFlow'
2023/06/03 15:47:25 - switch-case - Beam pipeline execution has finished.