Create a Pipeline
How pipelines work
Pipelines are the fundamental building blocks of your Hop projects.
Pipelines perform the heavy lifting: they read data from a variety of sources, perform a number of operations (combine, clean, enrich, transform etc) and write the data out to some target platform. A pipeline executes all of these operations in a predefined order and in parallel.
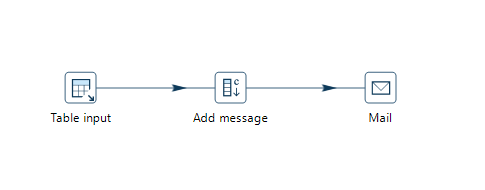
In the image below, a very simple pipeline reads data from a database, adds a message to the data and sends out an email. All of these operations are executed in a predefined order (read from the database, add the message, send the mail) and in parallel. The pipelines executes these transforms, Imagine our database table or query contains thousands of rows. The pipeline will start reading results from the query, pass those on to the 'Add message' transform. Once the message has been added, we’ll send a mail from the Mail transform. All of these will operate in parallel, so the Mail transform will already be sending mails while the table input is still reading records from the table or query.
Concepts
Pipelines consist of transforms connected by hops. In the mail example 'Table input', 'Add message' and 'Mail' are all transforms.
-
transforms are the basic operations in your pipeline. A pipeline typically consists of a lot of transforms that are chained together by hops. Transforms are granular, in the sense that each transform is designed and optimized to perform one and only one task. Although one transform by itself may not offer spectacular functionality, the combination of all transforms in a pipeline is makes your pipelines powerful.
-
hops link transforms together. When a transform finishes processing the data set it received, that data set is passed to the next transform through a hop. Hops are uni-directional (data can’t flow backwards). Hops only buffer and pass data around, the hop itself is transform-agnostic, it doesn’t know anything about the transforms it passes data from or to. Some transforms can read from or write to other transforms conditionally to or from a number of other transforms, but this a transform-specific configuration. The hop is unaware of it. Hops can be disabled by clicking on them, or through right-click → disable.
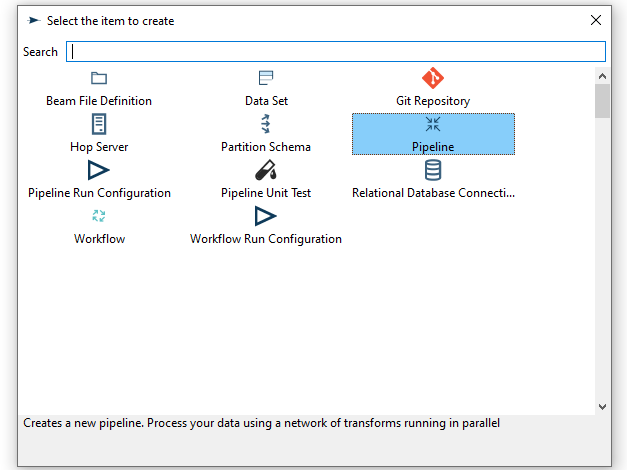
Create a pipeline
Create a new pipeline through the work item dialog. You’ll be presented with the dialog shown below.
When you are finished with your pipeline, save it. This can be done via the File menu, the icons or using CTLR s or Command s. For new pipelines a file browser is displayed to navigate towards the location you want to store the file.
Add Transform to your pipelines
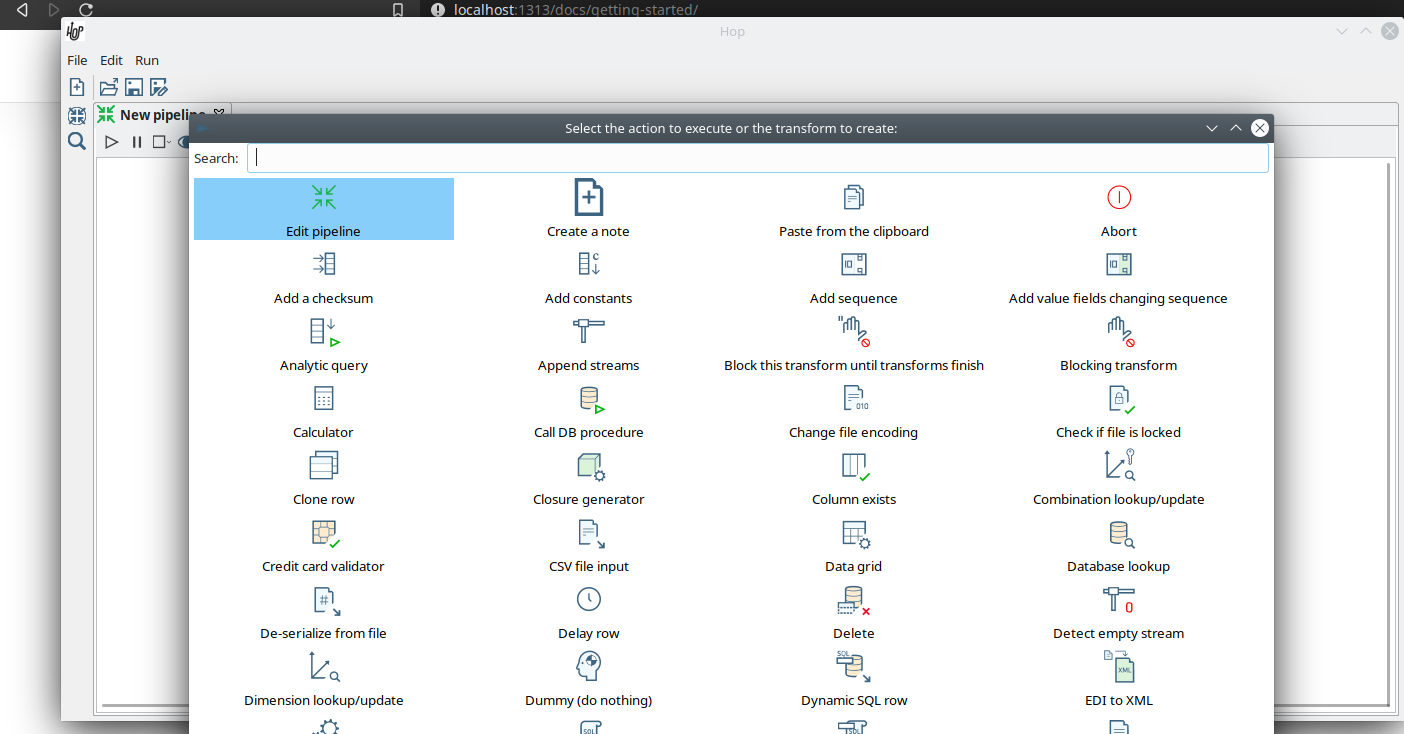
Click anywhere in the pipeline canvas, the area where you’ll see the image below.

Upon clicking, you’ll be presented with the dialog shown below. The search box at the top of this dialog works for transform, name, tags (TODO) etc. Once you’ve found the transform you’re looking for, click on it to add it to your pipeline. An alternative to clicking is arrow key navigation + enter. Repeat this step now or whenever you want to add more transforms to your pipeline. Once you’ve added a transform to your pipeline, you can drag to reposition it.
Check the list of transforms to add to your pipeline for more details.
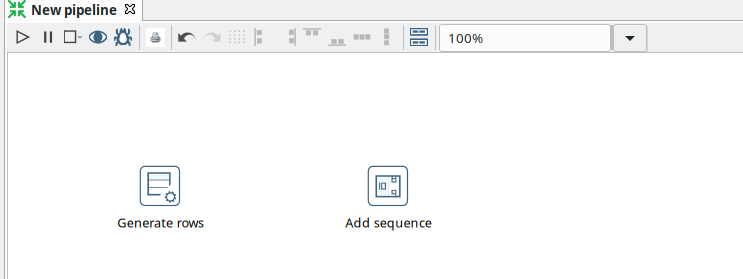
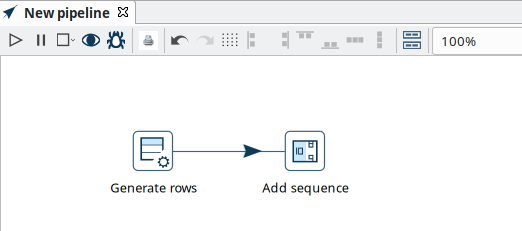
Add a 'Generate Rows' and a 'Add Sequence' transform, and your pipeline should like the one below.
The transform object can be configured through a single click on the object. The menu displayed below will be shown based on your transform object.
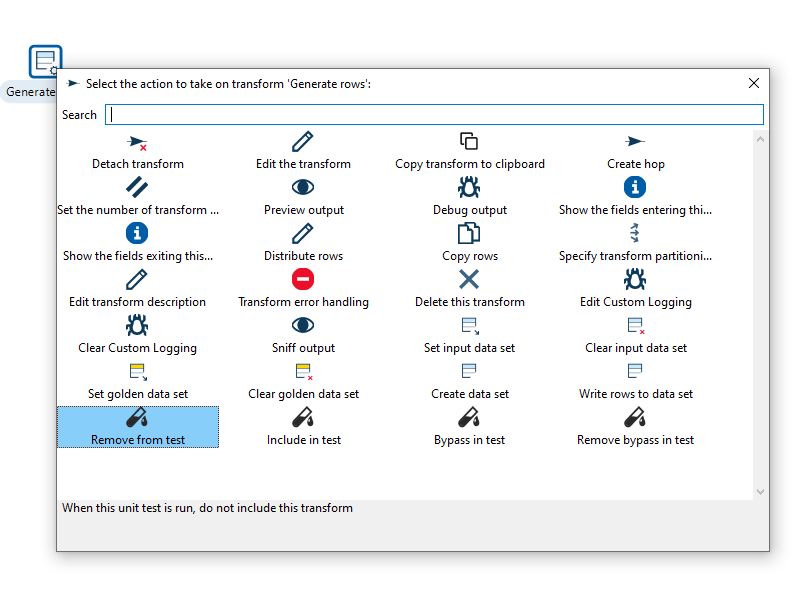
| Action | Description |
|---|---|
Detach transform | Detach the transform from the pipeline |
Edit the transform | Edit the transform’s metadata |
Copy transform to clipboard | Copies selected items to clipboard. |
Create hop | Creates a new hop between two transforms. |
Set the number of transforms | Starts several instances of a transform in parallel. |
Preview & debug output | Run the pipeline to preview rows from this transform and optionally pause when a breakpoint condition matches. |
Show the fields entering this transform | Shows metadata, like the field name and type for fields coming into the transform. |
Show the fields exiting this transform | Shows metadata, like the field name and type for fields coming out of the transform. |
Distribute rows | In case of more than one hop the data is distributed between the next transforms. |
Copy rows | In case of more than one hop the daya is copied to the next transforms. |
Specify transform partitioning | Specify how rows of data need to be grouped into partitions allowing parallel execution where similar rows need to end up on the same transform copy |
Edit transform description | Add a description to the transform. |
Transform error handling | Set the error handling for the transform, not available for all transforms. |
Delete this transform | Delete selected transform from the canvas. |
Edit Custom Logging | Edit the custom log settings for this transform. This will change the log level used for this transform. |
Clear Custom Logging | Clear custom log settings. This will clear the log level used for this transform. |
Sniff output | Take a look at 50 rows coming out of this transform. This will show a real-time table with a continuous output of the selected transform. |
Set input data set | Defines which data to use instead of the active input transform, applies to the selected unit test |
Clear input data set | Remove a defined data set from the selected unit test |
Set golden data set | The input to this transform is taken and compared to the golden data set you are selecting.\nThe transform itself is not executed during testing |
Clear golden data set | Remove a defined input data set from this transform unit test |
Create data set | Create an empty dataset with the output fields of this transform |
Write rows to data set | Run the current pipeline and write the data to a data set |
Remove from test | When this unit test is run, do not include this transform |
Include in test | Run the current pipeline and write the data to a data set |
Bypass in tess | When this unit test is run, bypass this transform (replace with a dummy) |
Remove bypass in test | Do not bypass this transform in the current pipeline during testing |
Add a Hop between transforms
There are a number of ways to create a hop:
-
shift-drag: while holding down the shift key on your keyboard. Click on a transform, while holding down your primary mouse button, drag to the second transform. Release the primary mouse button and the shift key.
-
scroll-drag: scroll-click on a transform , while holding down your mouse’s scroll button, drag to the second transform. Release the scroll button.
-
click on a transform in your pipeline to open the 'click anywhere' dialog. Click the 'Create hop' image::getting-started/icons/HOP.svg[Create hop, 25px, align="bottom"] button and select the transform you want to create the hop to.
Some transforms result in different types of hops.
| Hop | Description |
|---|---|
Result is TRUE | Specifies that the transform will be executed only when the result from the previous transform is true |
Result is FALSE | pecifies that the transform will be executed only when the result from the previous transform is false |
Main output of transform | The default hop between two transforms |
Pipeline properties
Pipeline properties are a collection of properties that describe the pipeline and configure its behavior.
The properties dialog can be opened by double clicking on the pipeline canvas.
Following properties can be configured:
-
Pipeline
-
Parameters
-
Monitoring
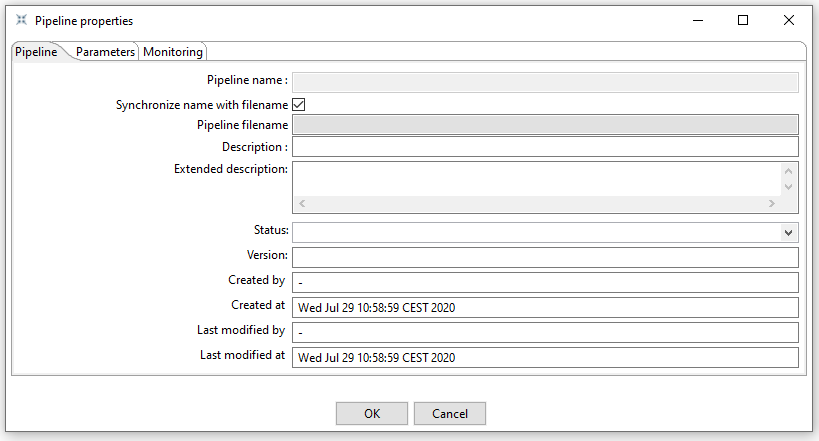
The Pipeline tab allows you to specify general properties about the pipeline including:
| Property | Description |
|---|---|
Pipeline name | The name of the pipeline |
Synchronize name with filename | If option is enabled the filename and pipeline name are synchronized. |
Pipeline filename | The filename of the pipeline |
Description | Short description of the pipeline |
Extended description | Long extended description of the pipeline |
Status | Draft or production status |
Version | Description of the version |
Created by | Displays the original creator of the pipeline |
Created at | Displays the date and time when the pipeline was created. |
Last modified by | Displays the last user that modified the pipeline |
Last modified at | Displays the date and time when the pipeline was last modified. |
The parameters tab allows you to specify parameters specific for the pipeline. Parameters are defined by a name, a default value and a description.

The monitoring tab allows you to specify the monitoring of the pipeline.

The options to set in this tab are:
| Property | Description | Type |
|---|---|---|
Enable transform performance monitoring | Enable performance monitoring for the transforms in this pipeline | boolean |
Transform performance measurement interval (ms) | The interval (milliseconds) to monitor the performance for the transforms in this pipeline | integer |
Maximum number of snapshots in memory | the number of performance monitoring snapshots to keep in memory for the transforms in this pipeline | integer |