Snowflake
Configuration
| Option | Info |
|---|---|
Type | Relational |
Driver | Included |
Version Included | 3.23.1 |
Hop Dependencies | None |
Documentation | |
JDBC Url |
|
Driver folder | <Hop Installation>/lib/jdbc |
Establishing a Snowflake SSL Authenticated Connection.
Introduction
This short guide will take us through creating a Snowflake user that is configured as a service account with a public key attached and get Apache Hop configured so that it can have a connection that uses the private key, role, compute etc. to carry out further work.
Create an RSA Keypair and the Hop Service User in Snowflake
To get started, you should create an rsa keypair for the service user you want to use with Hop when connecting to Snowflake.
You can generate an RSA keypair on most Linux / WSL (Windows Subsystem for Linux) by running the following command in the terminal window
openssl rsa -in rsa_key.p8 -pubout -out rsa_key.pub
The rsa_key.pub file contents is what you will then use in your Snowflake CREATE USER statement.
USE ROLE SECURITYADMIN;

CREATE USER SVC_ETL_HOP_USER_TEST
    DEFAULT_WAREHOUSE = ING_DEV_WH
    DEFAULT_NAMESPACE = DB_DEV
    DEFAULT_ROLE = SVC_ETL_DEV_ROLE
    TYPE = SERVICE
    RSA_PUBLIC_KEY = 'public key copy paste in single quotes'
    COMMENT = 'Test ETL service user';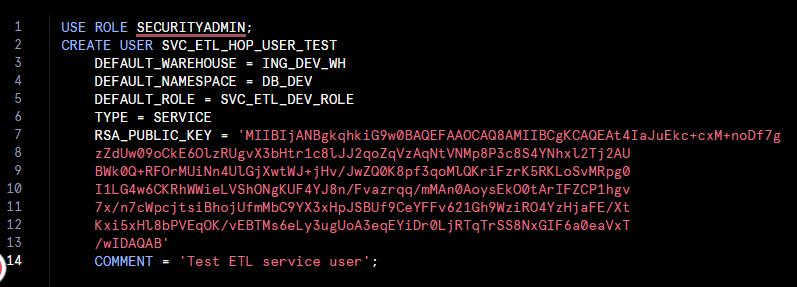
In the screenshot, we can define all the properties we intend the user to take on, including which default compute (warehouse) to use, namespace (database), and role. We also define a special attribute TYPE = SERVICE to ensure the user cannot log in using a sign-in page but only programmatically.
Download the Snowflake JDBC driver an Crypto Libraries
Download a current Snowflake JDBC Driver. The filename has the naming pattern snowflake-jdbc-3.19.0.jar
To support certificate based authentication, we also need to download two jar files from Bouncy Castle, who make a famous Java Crypto API library.
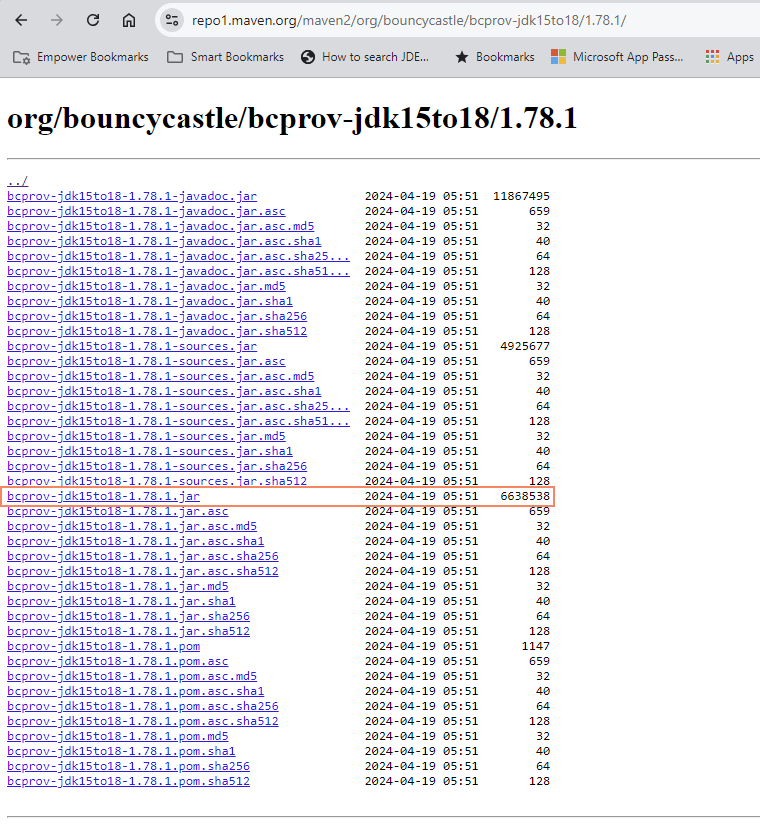
The first is a provider jar whose name indicates the JRE/JDK version supported. Make sure you download the correct version for your JDK that matches the version Hop requires. This first file to download is bcprov-jdk<VERSION>.jar
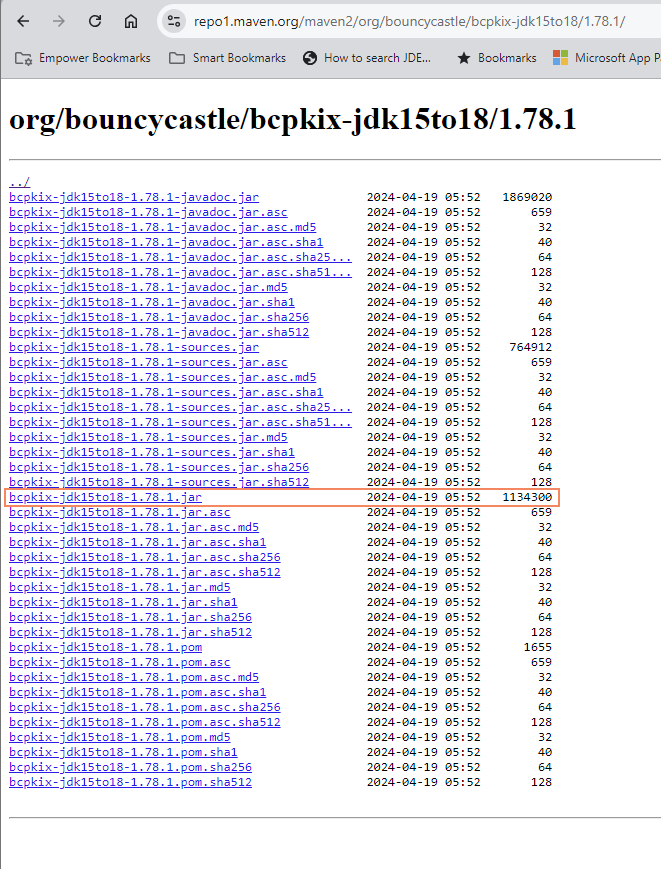
Secondly, we need the encryption library, which also has JDK version support in the filename. The filename is bcpkix-jdk<version>.jar
The JDBC driver and two Bouncy Castle cryptography library jar files need to go into hop/lib/jdbc . Be sure to delete any older version of the Snowflake JDBC driver jar you find in hop/lib/jdbc. The Snowflake drivers are well-maintained and updated often.

Place the RSA Private Key in Hop’s Folder
The private key file must be stored in Hop’s root folder.
There could be ways to include the private key from other paths than the Hop root folder (e.g. defined in the connection’s Options tab), but this is currently still unclear. |

Gather Snowflake Connection Properties
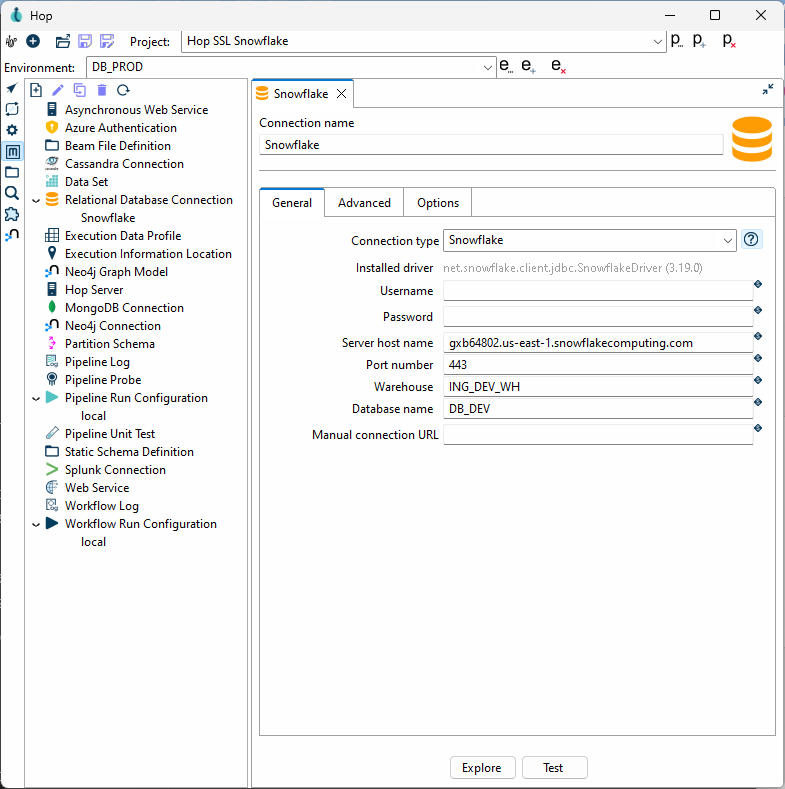
Let us begin with the end result and then describe where each of the properties came from and why.
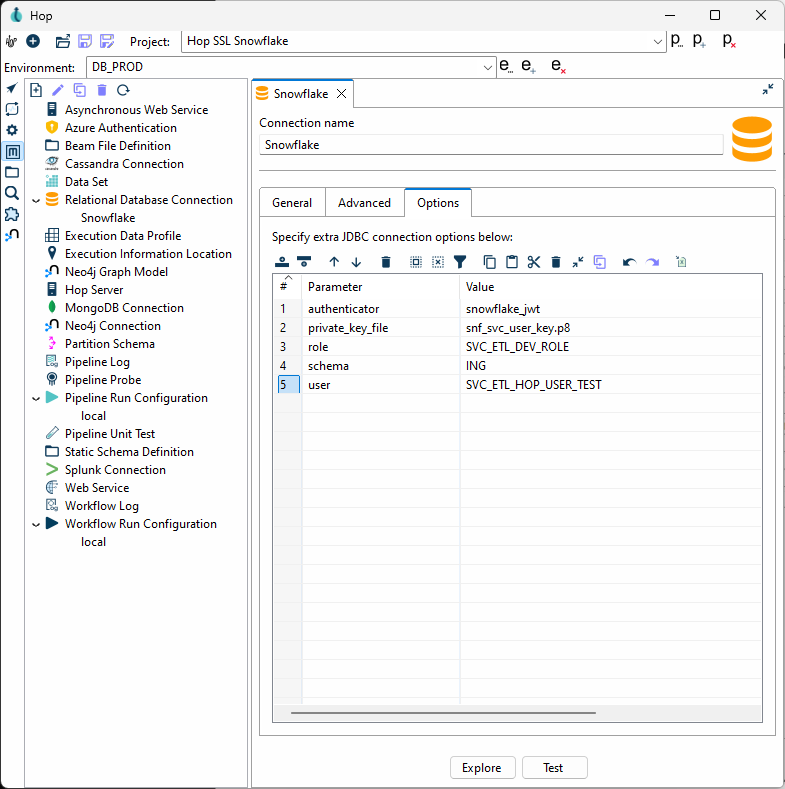
Most connections in Hop use typical fields like Server host name, Port number, Warehouse, Database name, but since this is a more advanced connection configuration, we need to take advantage of extra JDBC parameters that we can set on the Options tab shown below.
Looking at the Options tab, we make use of a few keywords, authenticator, private_key_file, role, schema, and user. The parameters are from the Snowflake JDBC parameters documentation site.
We first tell the JDBC driver that we are going to use snowflake_jwt for authenticating, which means that it will expect to see some kind of private and public key.
In this case, the private_key_file parameter is used. This could for example come from a certificate from an AWS Secret Store. In this case, the certificate or key file doesn’t have to be left in the environment and are disposed of when the image goes away.
Other variables would allow you to encode it (BASE64) etc.
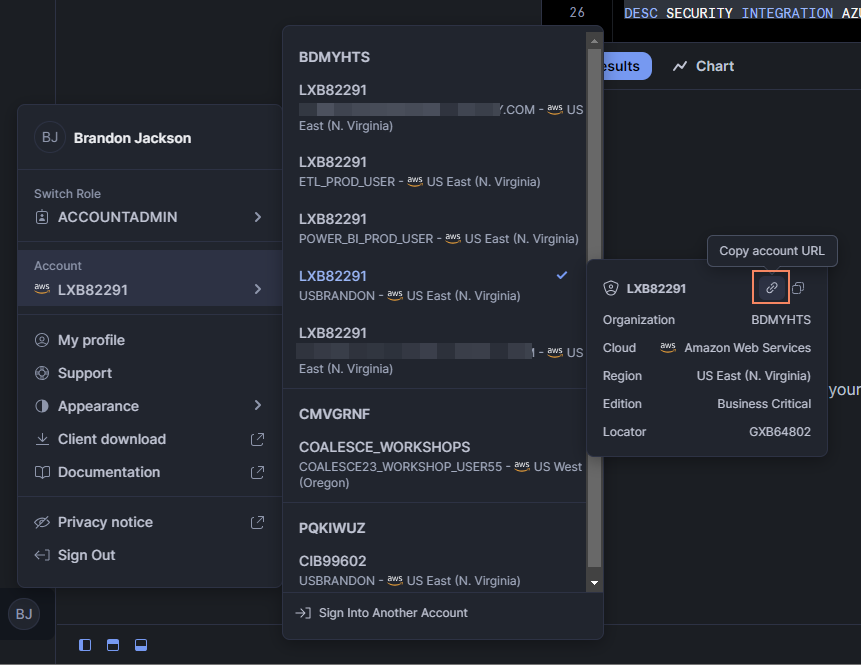
The URL for the Server host name can be retrieved by clicking on your name in the Snowflake console on the lower left corner, select your instance, and then there is a little link icon.
When you paste this into Hop’s dialog box, get rid of the HTTPS:// part as it is not required. The connections are always encrypted.
