File Explorer Perspective
Icon: 
Keyboard shortcut: CTRL-Shift-E
Description
The File Explorer perspective is where you’ll spend most of your time in Hop Gui. This is where pipelines and workflows are built, tested and run, and where you’ll perform most of your file operations.
The project tree on the left shows the files in your project. Files you open appear as tabs in the editor area next to the tree. This perspective contains handlers for the most common file types known to Hop. These are obviously hwf (workflows) and hpl (pipelines), but also JSON, CSV, TXT, XML, Markdown, SVG, Log and SAS 7 BDAT files. The File Explorer perspective is also where you’ll manage version control for your projects through Git integration.
Older Hop versions had a separate Data Orchestration perspective for editing pipelines and workflows. It has been merged into the File Explorer perspective.
Its CTRL-Shift-D shortcut now opens the Database perspective; pipeline and workflow editing stays on CTRL-Shift-E.
|
| Even though fully functional, the editor for most file types in the File Explorer is rather basic. Expect these to evolve in the next Hop releases, or check the code contribution guide if you’d like to help us improve Hop by contributing file editors. |
Editing pipelines and workflows
Open or create a pipeline or workflow and it appears in a new tab in the editor area, with its own graph toolbar above the canvas.
An optional Spoon-style palette tree of transforms or actions can be shown on the left of the canvas with the palette button on the graph toolbar (hidden by default). See the palette tree in the popup dialog page.
For more information on how to get started with pipelines, see the Pipelines getting started guide.
For more information on how to get started with workflows, see the Workflows getting started guide.
File operations
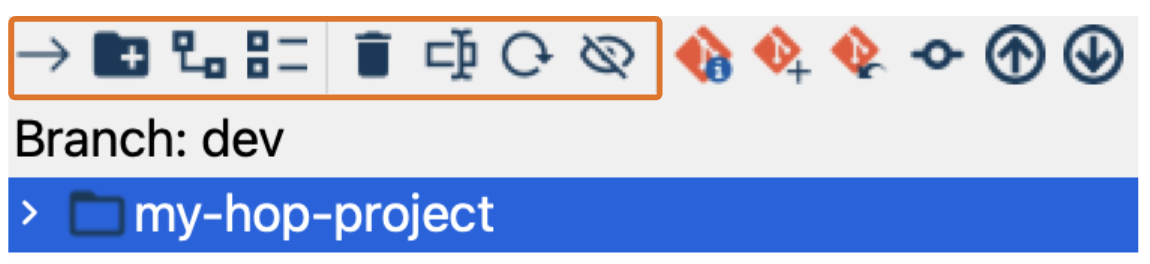
The file operations are available through a number of toolbar options:
-
Open selected file: Use the right arrow or double-click to open a selected file. You can also open a file simply by double-clicking it. The file is opened in a new tab in the editor area; pipelines and workflows open in their graph editor. Select multiple files with
Ctrl(Cmdon macOS) orShiftto open them all at once. -
Create folder: Add a new folder. This works on a single selected folder.
-
Expand all folders: Display all nested folders in the directory tree.
-
Collapse all folders: Hide all nested folders in the directory tree.
-
Delete: Remove a selected file or folder. Only one file or folder at a time.
-
Rename: Rename a file or folder. Only one file or folder at a time.
-
Refresh: Refresh the file list.
-
Show or hide files: Show or hide files or directories.
New pipelines, workflows and files are created from the file explorer’s right-click menu rather than the toolbar; see the "Right-click menu options" section below.
Toggling the File Explorer Panel
When the File Explorer perspective is already active, clicking the File Explorer button in the perspectives toolbar (left side) will toggle the visibility of the file explorer panel (project tree). This allows you to maximize the workspace area when you don’t need to see the file tree.
-
When the panel is visible: Clicking the File Explorer button hides the panel, maximizing the editor area.
-
When the panel is hidden: Clicking the File Explorer button shows the panel again, restoring the split view.
| The tooltip on the File Explorer button will indicate when you can toggle the panel: "File Explorer (Ctrl+Shift+E). Click the folder to show/hide the project tree" |
Configuration Options
The File Explorer perspective can be configured through the Configuration perspective under the Plugins tab. The following options are available:
-
The initial depth to load not lazily: Controls how many folder levels are loaded immediately when opening folders in the file explorer tree.
-
The maximum file size to load: Sets the maximum file size (in MB) that will be loaded when opening files in the explorer.
-
Show file explorer panel by default: When enabled, the file explorer panel (project tree) is shown by default when opening the explorer perspective. When disabled, the panel starts hidden, giving you more workspace for editing files.
-
Open help pages in: Where Help buttons and F1 open documentation: the system browser, a tab in this perspective, or a dialog on top of the current window.

Git integration
Description
If the git plugin (folder plugins/misc/git) is installed, the file explorer will look for a .git/config file in the project home folder. It this exists the explorer perspective will start to color code the files listed:
-
red: the file has not been added to git (un-staged).
-
blue: the file has been changed (staged).
-
gray: the file is ignored by git.
Git
Git info
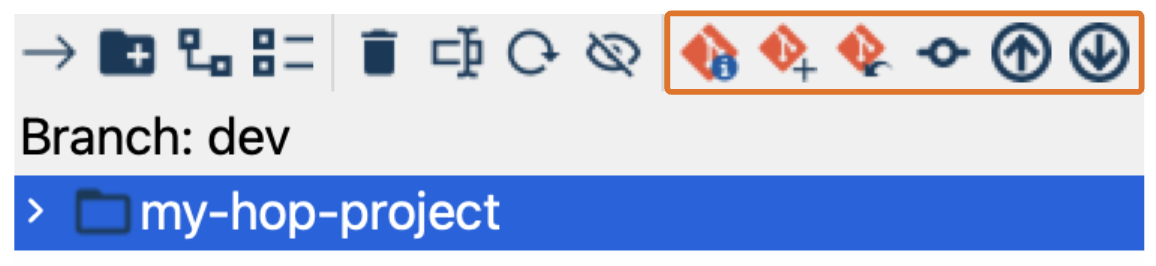
The "Git Info" icon in the toolbar will be enabled if there is information regarding the file or folder that is selected. If you click on it, you’ll be able to all sorts of information regarding the git history in a new tab:
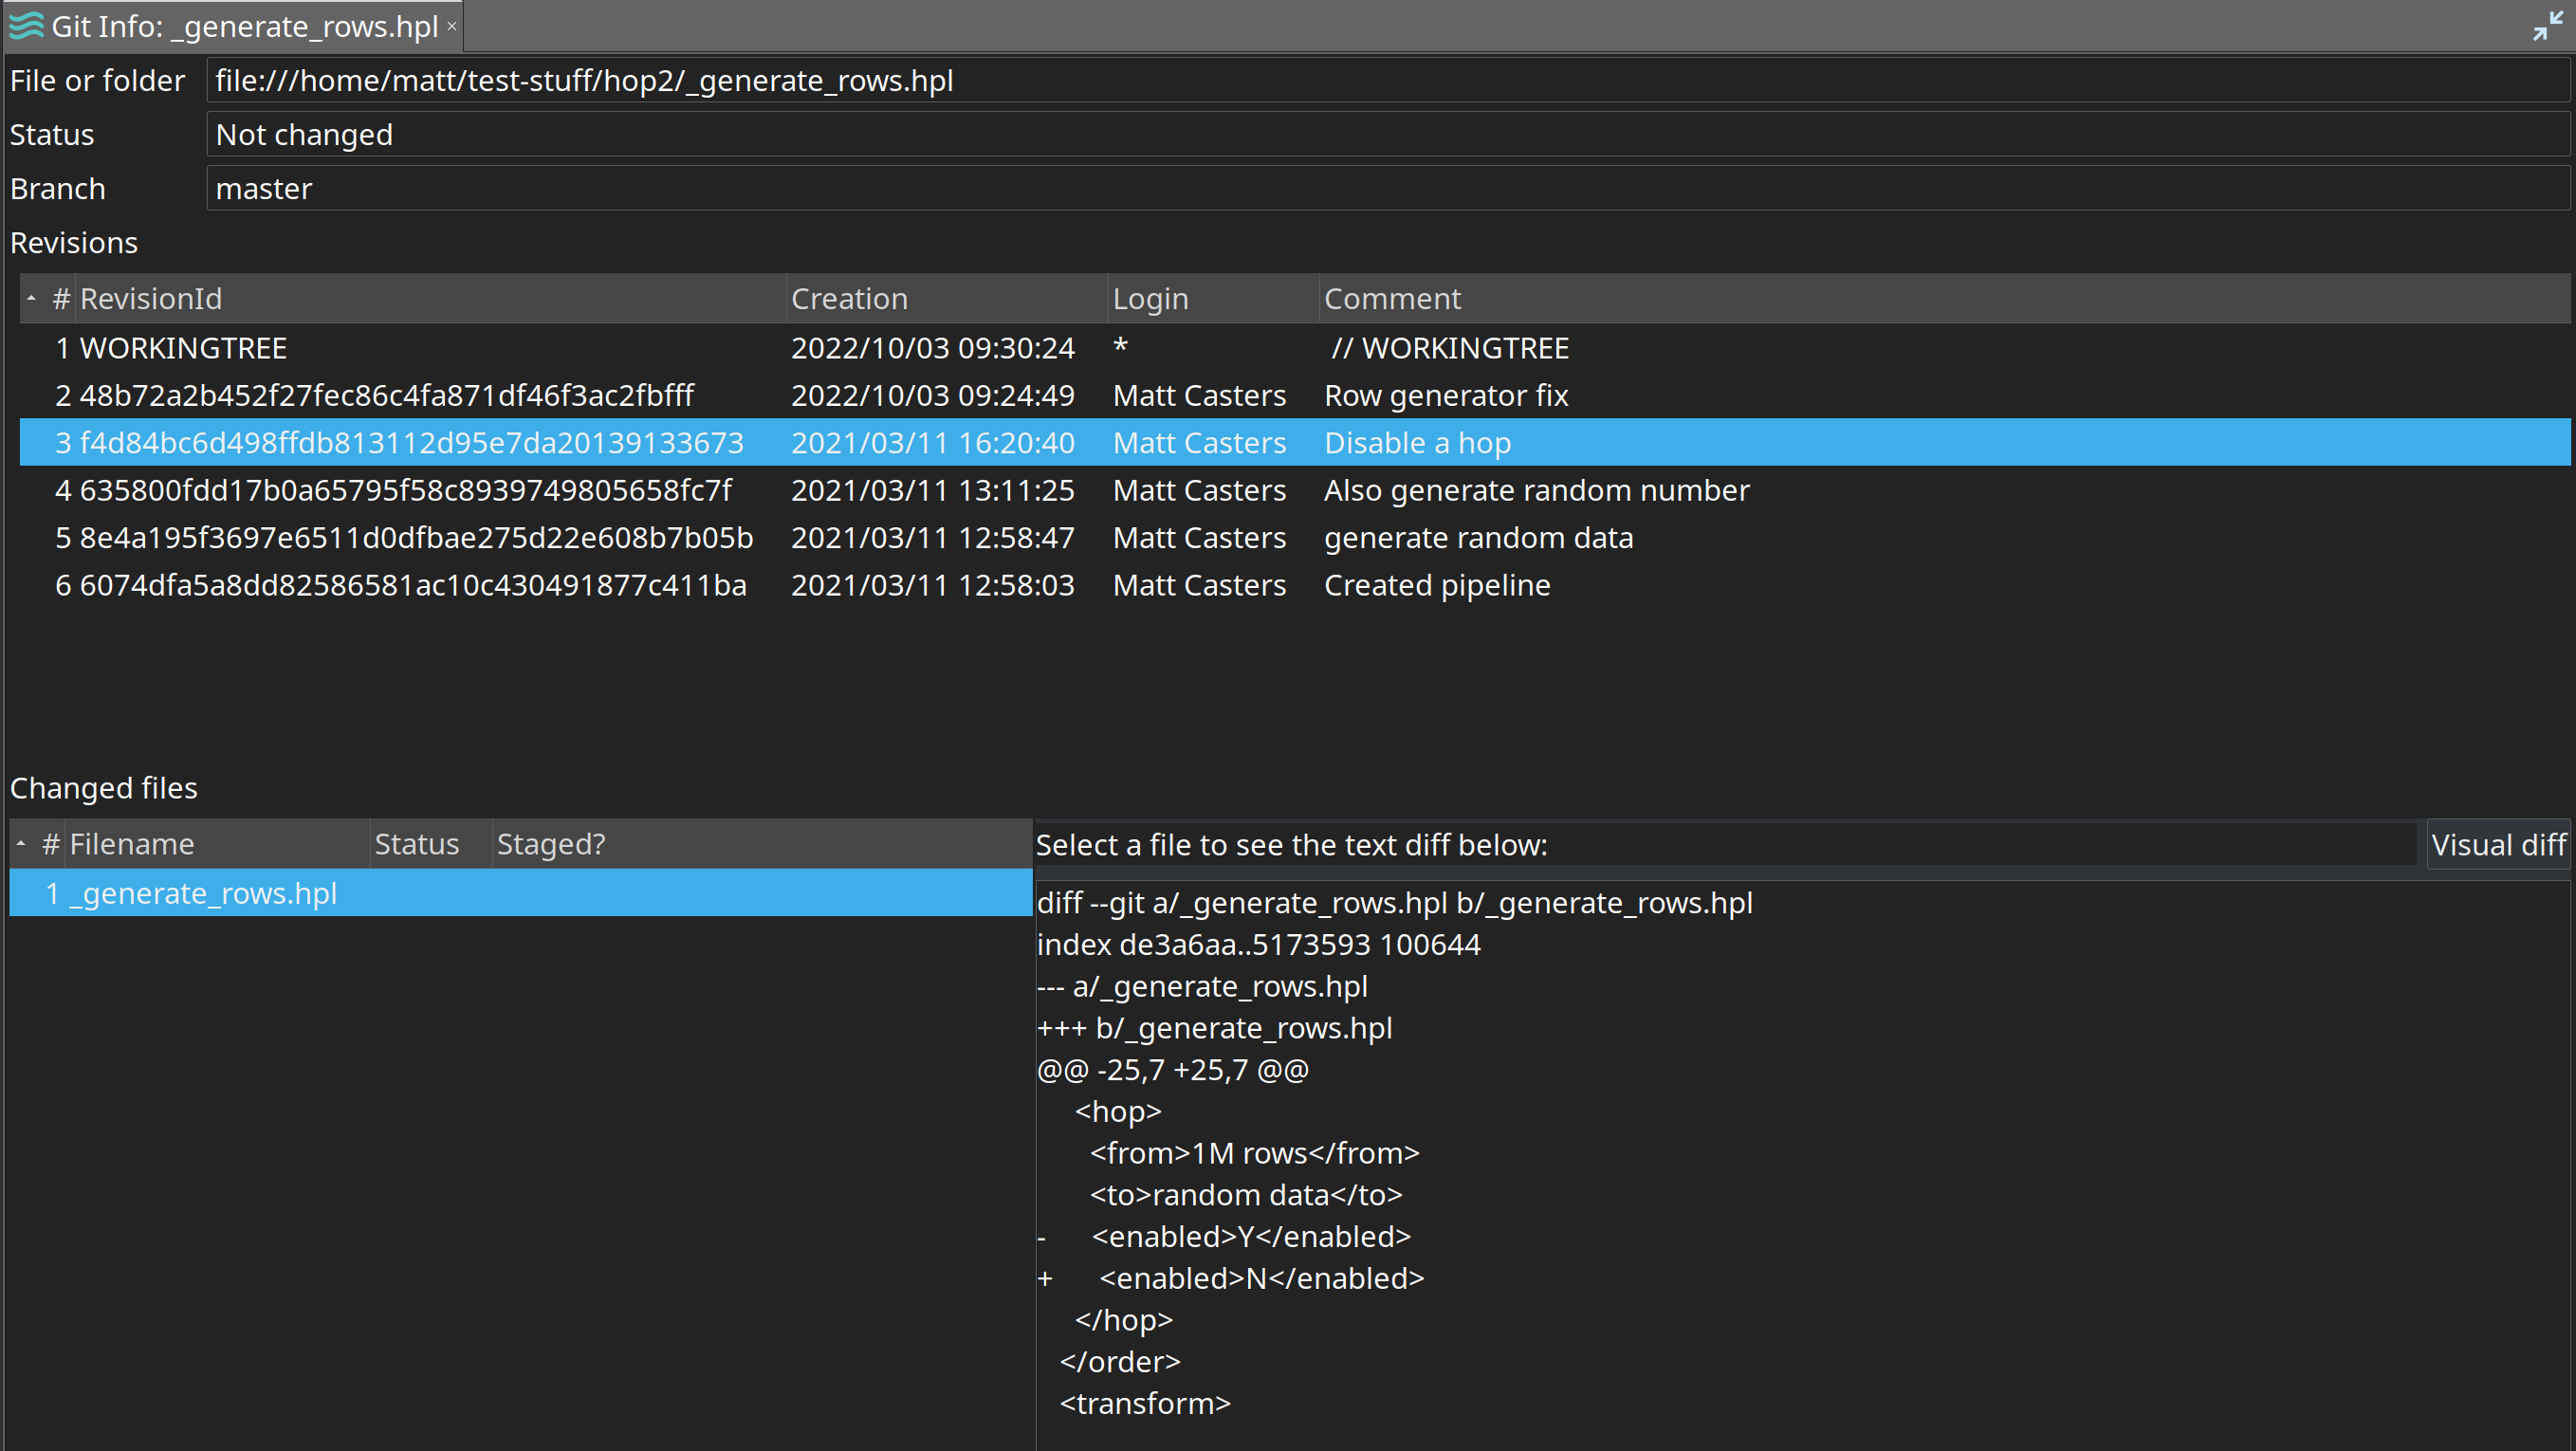
Below the revision history you can see the revisions of a file. If you select a revision you’ll be able to not only see the text differences between two revisions but also use the "Visual diff" button on the right-hand side of the tab. If you select the "visual diff" option 2 new tabs will be opened with the pipeline or workflow state before and after the change.
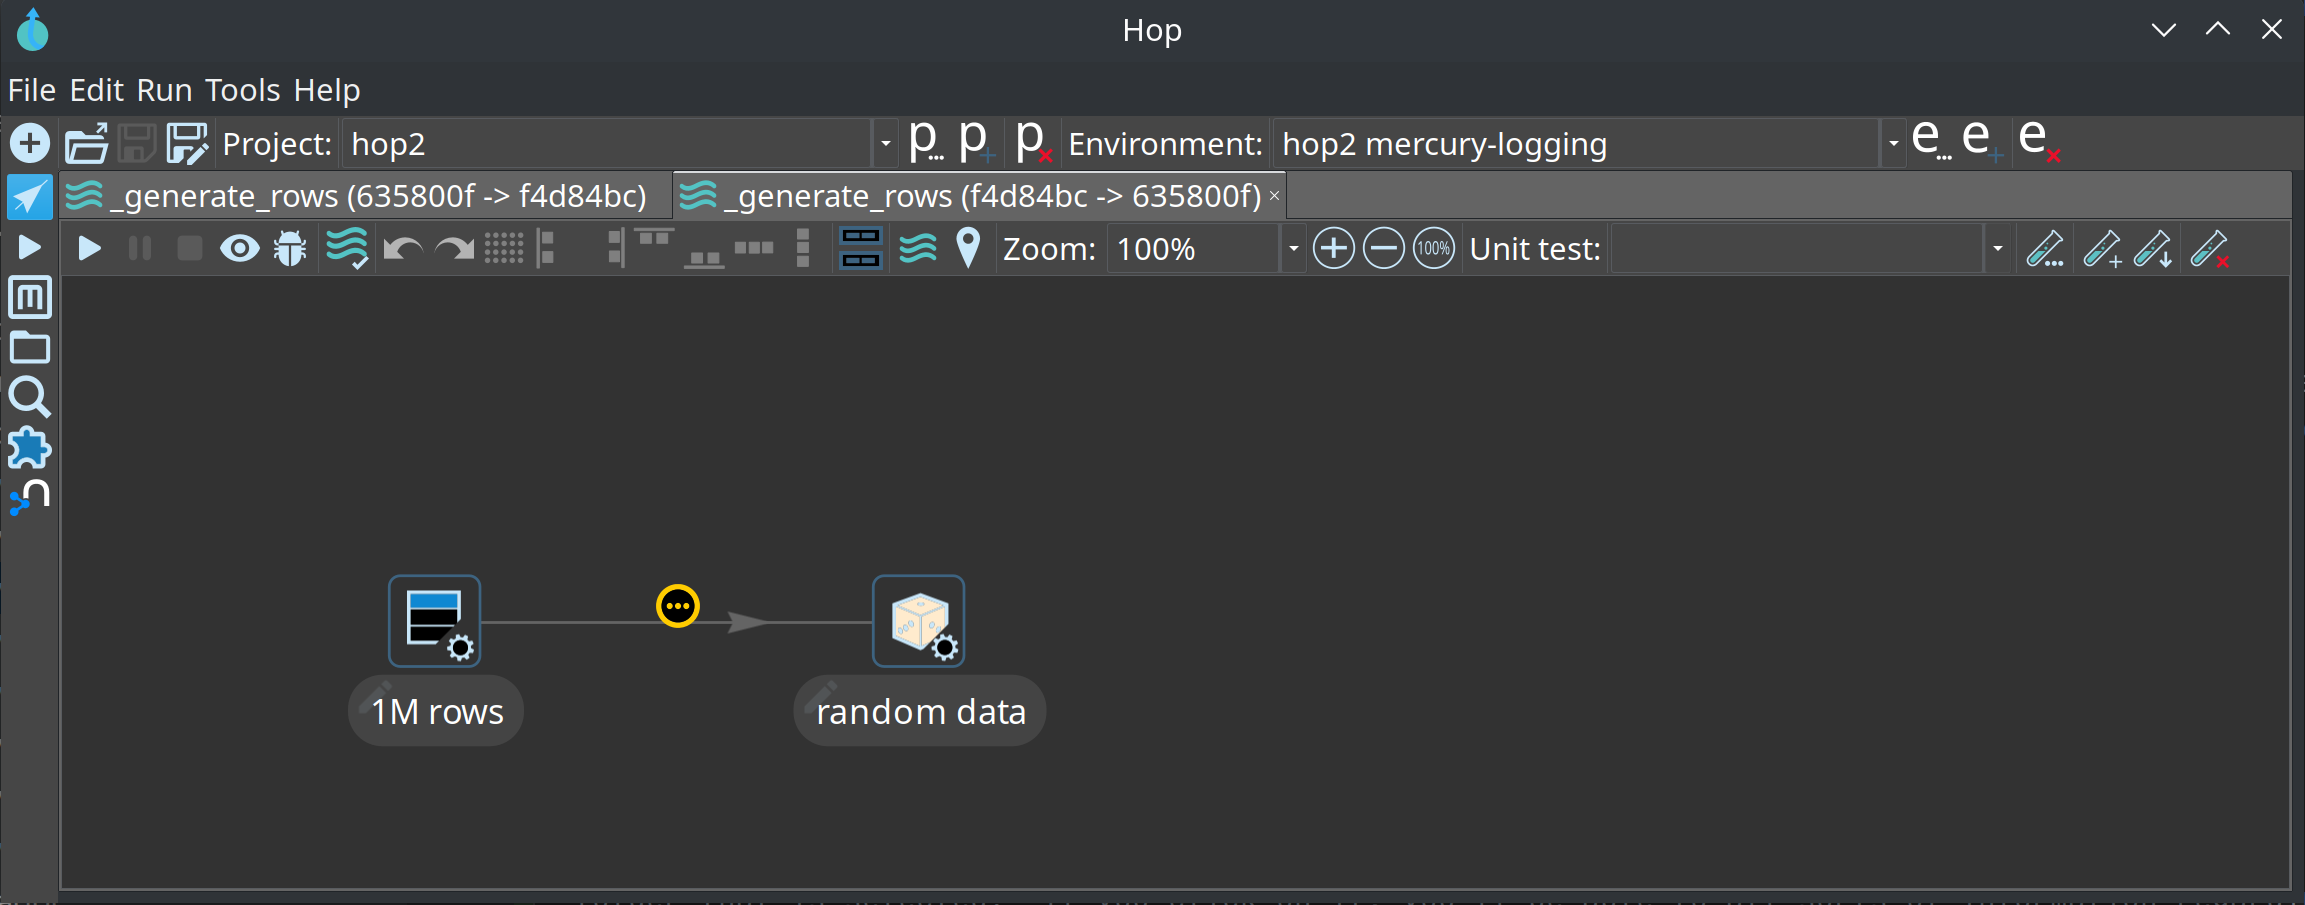
Small information icons will be added to the various transforms, actions and hops to indicate if they were changes, deleted or added.
Right-click menu options
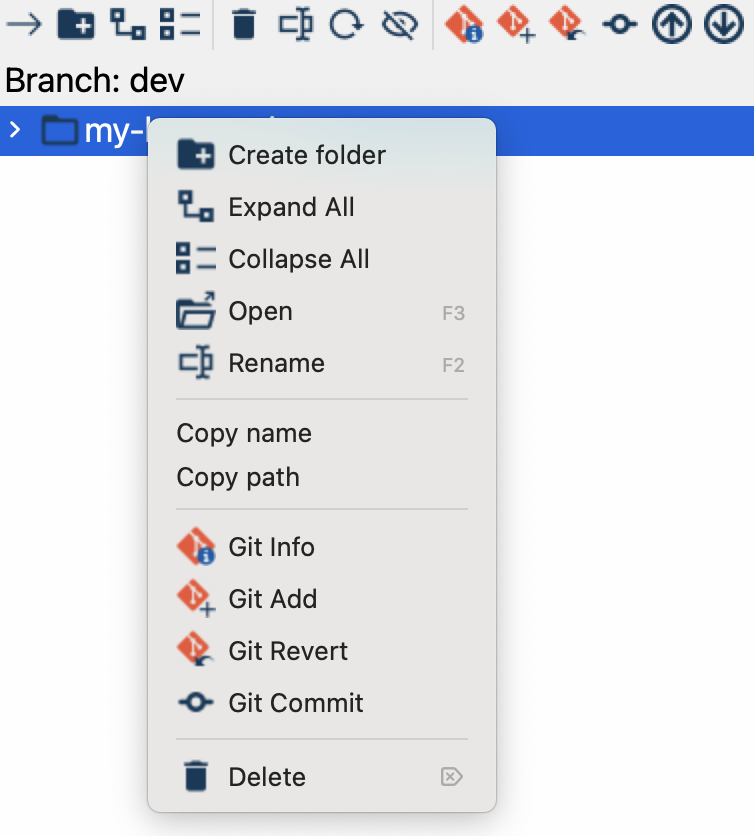
The right-click menu in Apache Hop Git integration offers several useful options to help manage your files and Git operations directly from the interface. Here’s a breakdown of each option:
-
Create pipeline: Create a new, empty pipeline inside the selected folder and open it. Only available when a folder is selected.
-
Create workflow: Create a new, empty workflow inside the selected folder and open it. Only available when a folder is selected.
-
Create file: Create a new, empty file inside the selected folder, choosing its name and file type, and open it. Only available when a folder is selected.
-
Create folder: Create a new folder within the selected directory. This is useful for organizing workflows, pipelines, and other project resources. Only available when a folder is selected.
-
Expand all folders: Reveals all nested folders in the project directory tree. Useful for getting a full overview of your project structure without opening folders one by one.
-
Collapse all folders: Closes all expanded folders, showing only the top-level directory. Helps reset the view or reduce visual clutter.
-
Open: Opens the selected file or folder. The file opens in a new tab in the editor area; workflows and pipelines open in their graph editor.
-
Rename: Allows you to change the name of the selected file or folder, helping you keep your project files organized and clearly labeled.
-
Copy name: Copies the name of the selected file or folder to your clipboard, making it easy to paste and reference elsewhere.
-
Copy path: Copies the full path of the selected file or folder to your clipboard, useful for quick navigation or sharing the location with others.
-
Git Info: Displays detailed information about the Git status of the selected file, including any recent changes.
-
Git Add: Stages the selected file(s) for commit, meaning the changes are prepared for inclusion in your next Git commit.
-
Git Revert: Reverts any changes made to the selected file, restoring it to the last committed state. This is helpful when you need to undo accidental modifications.
-
Git Commit: Opens a dialog for committing staged changes to your local Git repository. You can add a descriptive commit message summarizing your updates.
-
Delete: Removes the selected file or folder from your project. Make sure to use this carefully, as it permanently deletes the item from your directory.
Git operations
Here are the basic git operations that are supported:
-
Git Add: stage the file to include it in a commit.
-
Git Commit: commit changes to origin.
-
Git Revert: checkout file or folder to revert changes.
-
Git Push: push changes.
-
Git Pull: pull changes.
You can access these operations from the toolbar above the file explorer tree: